Recently, I was fortunate enough to spend some time in the Fairglen tract, just outside of downtown San Jose, home to one of the iconic Eichler neighborhoods. Inspired by the designs of Frank Lloyd Wright, Joseph Eichler was a prominent property developer in the late 1940’s-1960’s, and was responsible for these very unique neighborhoods.
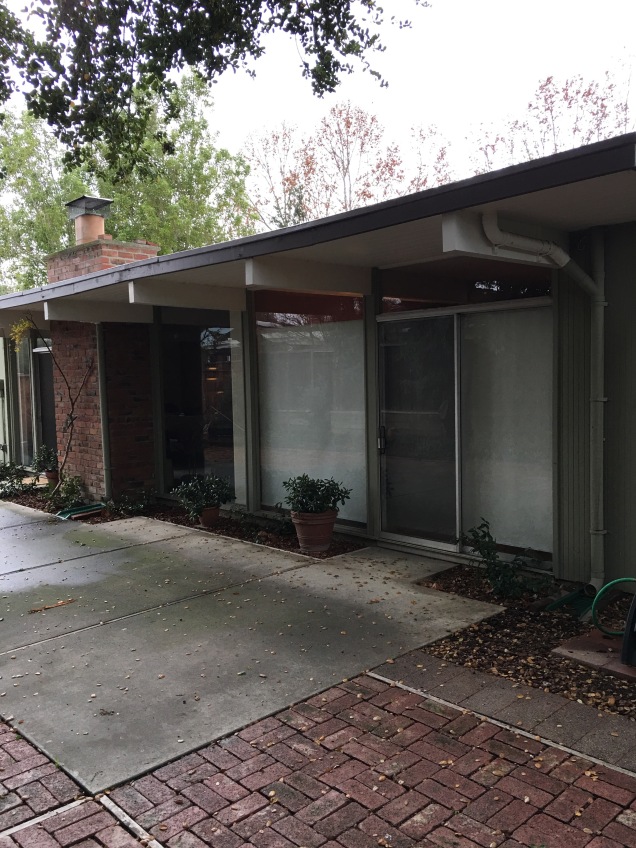
Eichler Homes sidewalk stampGorgeous streamlined frontage & flat roofI did a short walking tour through the tree-lined streets, and imagined life way back when, in this Mid Century time capsule. It is a design and architecture lovers dream.
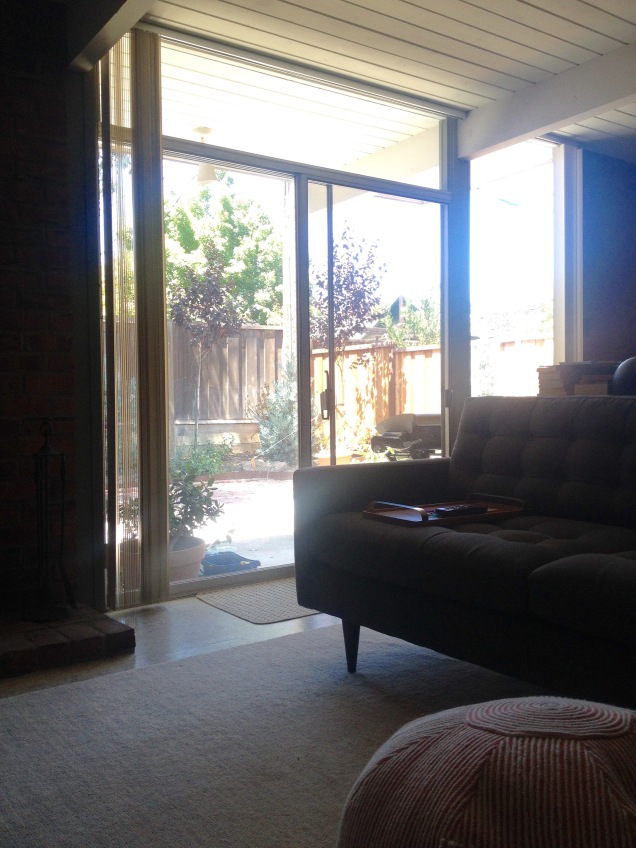
Slightly A-framed roof, still low profileYard facing glass wallsThere’s something special about warm wood paneled walls, interior atrium, window walls and flat roofs, and these stunning San Jose Eichler’s are a true piece of Mid century modernist architecture. The open plan and airy feel were considered futuristic by many, and have influenced many design trends since.
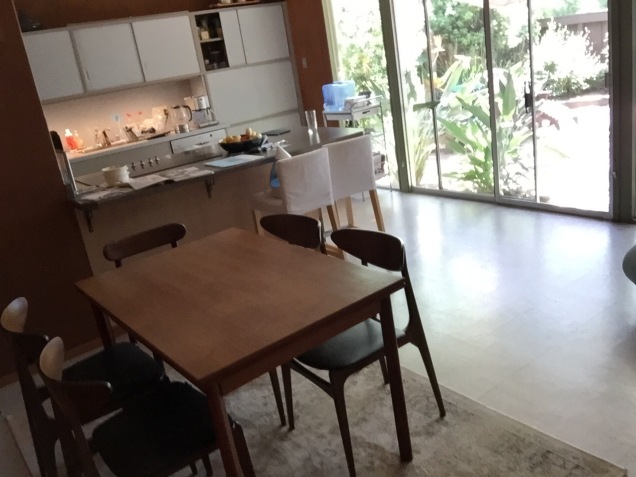
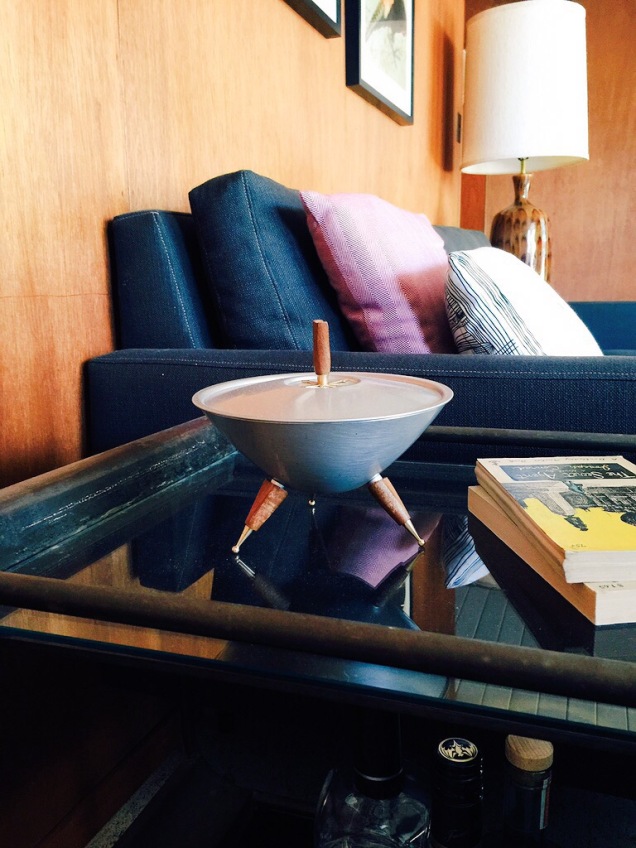
Iconic original kitchen cabinetry & glass wallExposed wood beam ceilings, and stunning wood paneled walls. Swoon!More fabulous wood paneling & radiant heated floors.Afternoon silhouettes, windows galore!A gorgeous Mid Century abode, appointed with a mixture of modern and vintage pieces. Perfection! (Vintage Lava Drip glaze lamp & Mirro Medallion candy dish courtesy of Atomic Magpie!)Street after street of these gorgeous, well preserved and respected homes make this neighborhood a treat to wander. Original fixtures, gates & mailboxes, some updated, some preserved, all fabulous. Anyone with an interest in all things Mid Century, or even those who just appreciate classic architecture, should go take a stroll around one of these incredible neighborhoods. You wont regret it!
The original mailbox. Weathered, but fantastic!
Entryway
Frontages generally featured few windows, windowed walls faced gardens and inner atriums
Original gate
To check out our selection of Mid-Century treasures, click here
Recently, I was lucky enough to snag a trio of vintage Tulip style chairs for a steal. They were rusty, dirty and scuffed and needed a lot of love but, with bones like these, impossible to resist. Widely considered to be a classic of industrial design, the Tulip chair was designed by Finnish born designer Eero Saarinen in the mid 1950’s for Knoll. The smooth, modern lines of this chair have made it an iconic mid-century piece, and one I could not pass up.
Before, the “for sale” picMore before!
After giving the chairs a good look over, I realized that the fiberglass uppers were actually in pretty decent shape and mostly just in need of a really thorough cleaning. That said, it was a good hour of scrubbing and buffing to get them into tip top shape. I started with a little regular kitchen cleaner to get the first layer of grime off, I then followed up with a magic eraser. Which lived up to its name! The chairs were shiny in no time.
Clean and shiny. The holes are where the seat pads attach…more on that later.
The metal bases were another story – covered in rust and dings. Thankfully the rust was only surface deep and hadn’t eroded any of the metal too seriously. I started by sanding them (wearing a breathing mask of course!) with a coarse 100 grit sandpaper, which removed most of the obvious rust. I followed up with a 220 grit to smooth it all out. In between I used a wet rag to wipe away the rust and dirt that was coming off. Some parts of the bare metal were exposed, but I was able to get a smooth surface pretty easily.
Close up of the base
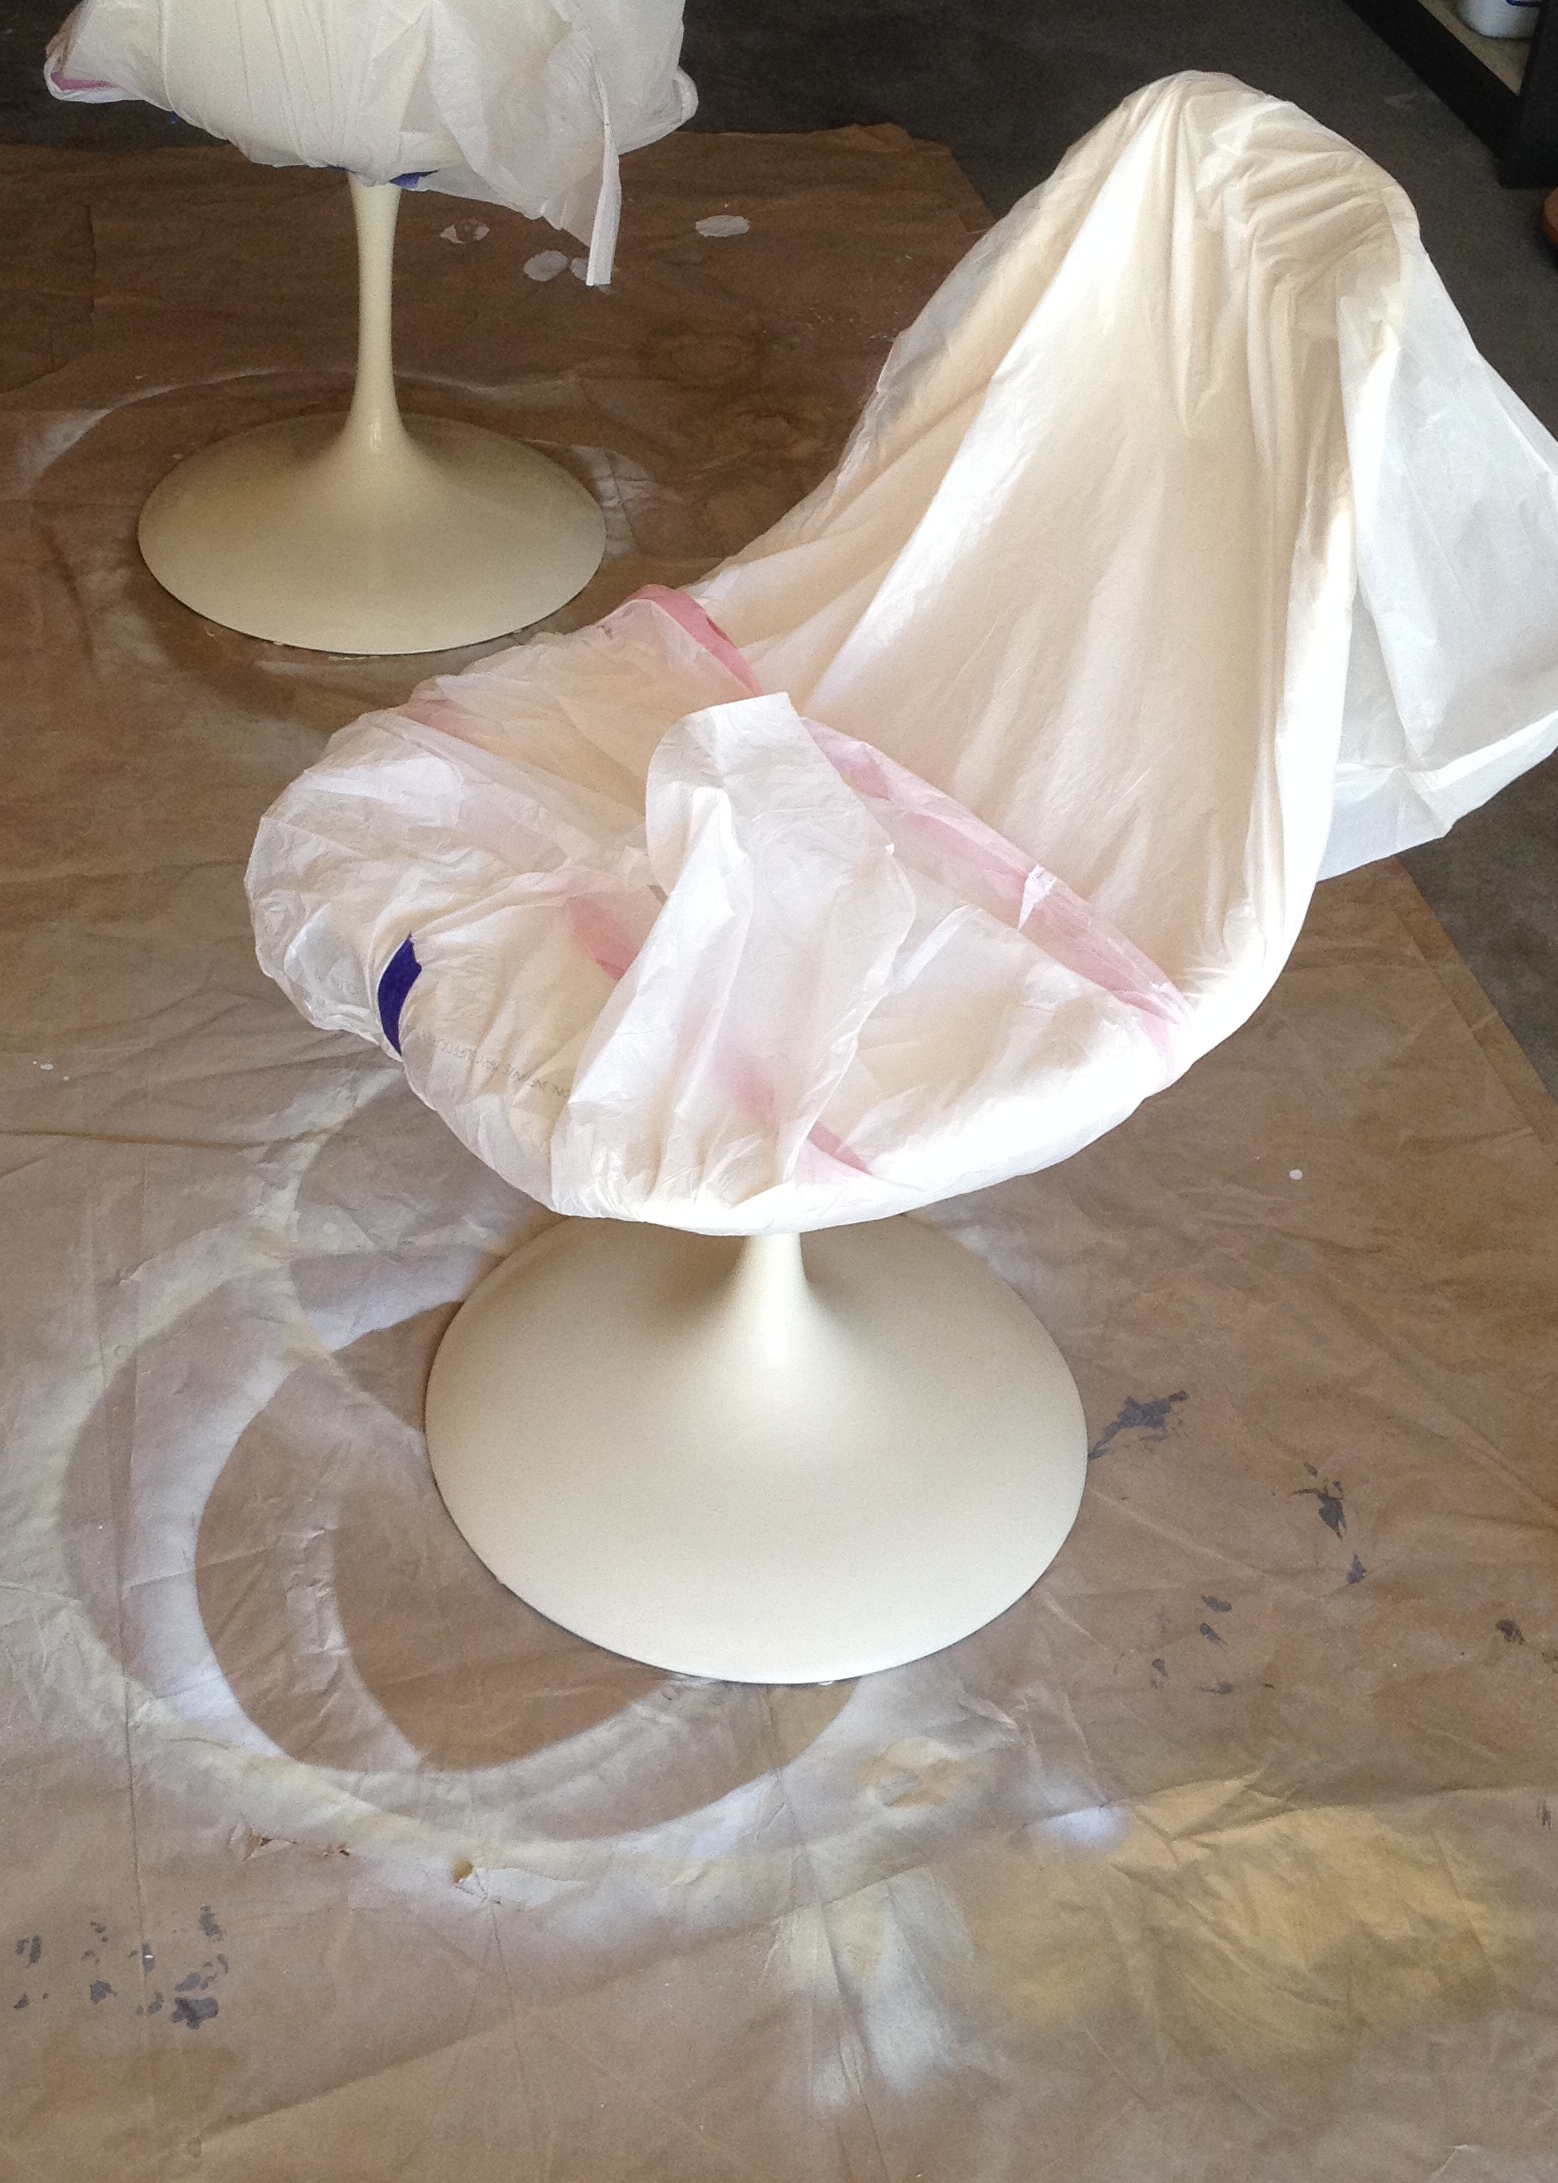
In much of my research of restoring tulip chairs I had read about the difficulties many people had faced with getting the bases back on the seats after removing them, so I opted not to take them off, and instead covered the seats. This was mostly because I get frustrated by mechanical things easily and knew I would probably struggle to get them back on in a timely manner. I’m also rather impatient. So trash bags and painters tape it was, and this worked perfectly.
High end paint protection
I then primed the bases using “Killz” spray on primer containing rust protection. After letting this dry, I used Krylon’s prime and paint in one, in Ivory. My only advice here is DO NOT USE KRYLON spray paint. I followed the instructions to the T, I shook the can for a good two minutes and the paint came out lumpy. Like little sand granule sized lumps. Freak out, lose my mind, lumpy. So, I had to let this dry completely and sand it off and start the process over (cursing Krylon’s name the whole time). Once I was back to square one, I used my old trusty Rustoleum Heirloom White. This was MUCH BETTER and I should have stuck with what I knew. Lesson learned.
One coat down
I did 3 light coats of paint, letting each one properly dry in between. I’ve learned over the course of a few projects that when it comes to spray painting, the best finish comes from multiple light layers, as opposed to drowning the first layer. Of course, I’ve read this a million times, but had to learn it for myself. So, take my word for it, it’s true. Once it was fully dried (I let it sit for 24 hours) I went over with a final layer of Rustoleum’s spray on Ultra cover clear gloss.
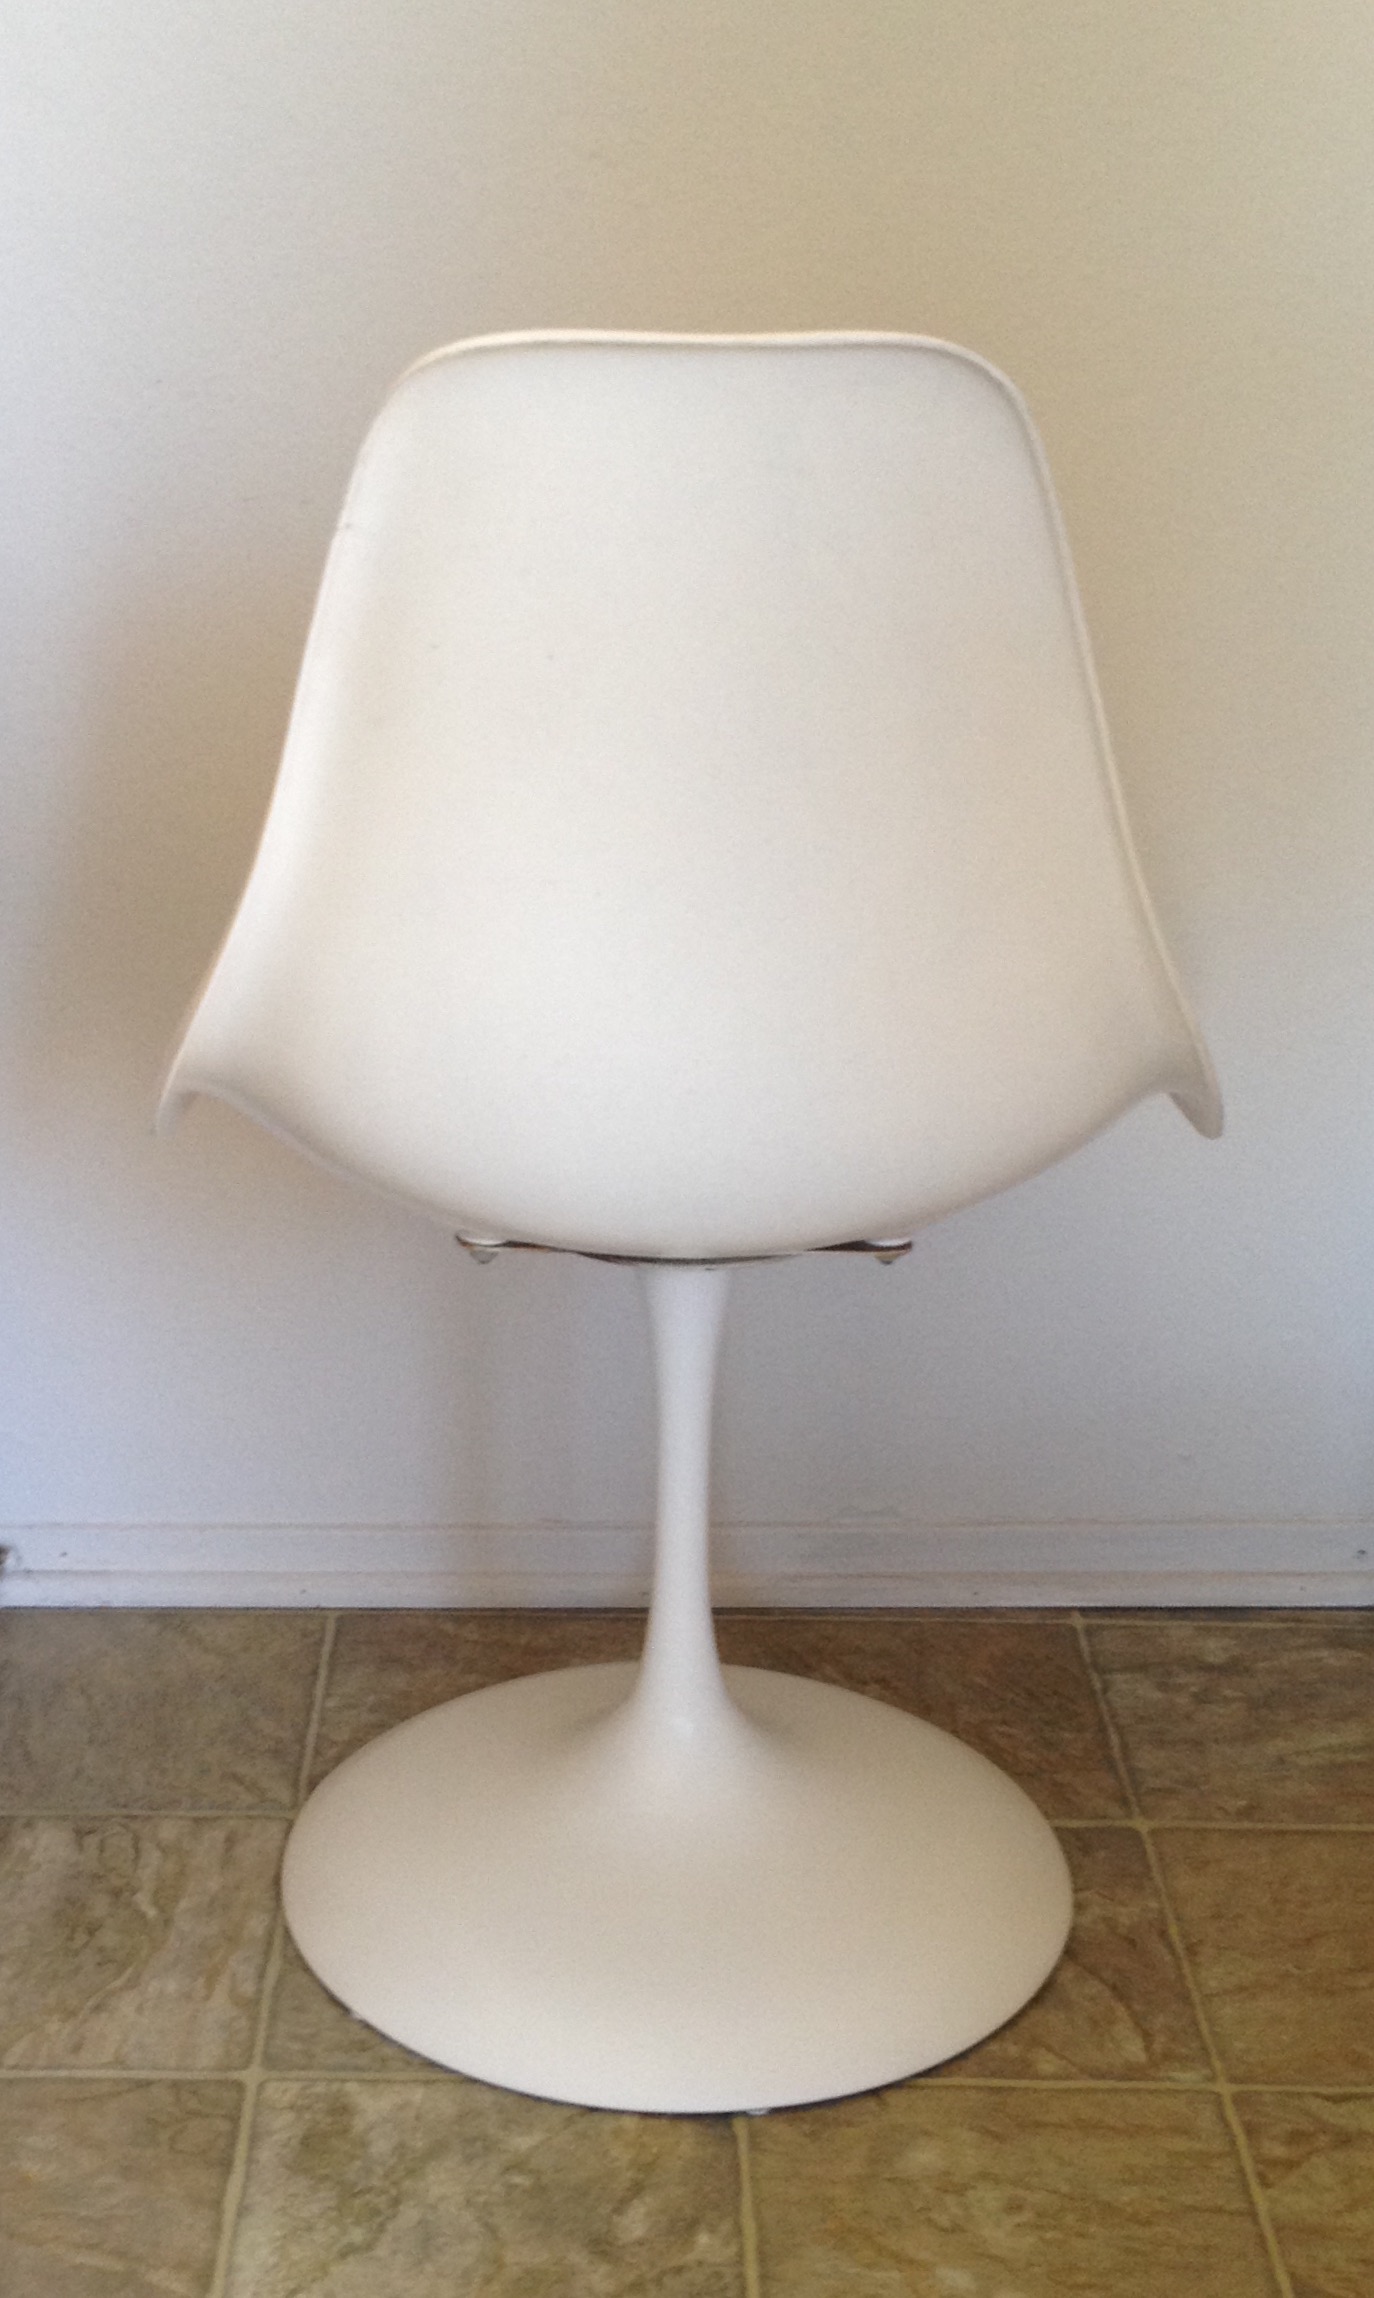
Finished!
So here is the mostly finished result. These chair pads aren’t the ones I’m going to ultimately use, they’re a temporary fix until the proper ones are finished. I just couldn’t wait to share, but will update the pics as soon as the new pads are complete.
Like our favorite blue monster, we have our share of cookie fanatics around here, and what better way to fabulously display and store glorious cookies, than this mod-tastic cookie jar! Made in the USA, with a whopping 3 liter capacity, we just love this vintage gem.
My love of all things Mid Century left me with little choice but to get sucked into the vortex that was Mad Men (binge watching TV series on Netflix is a favorite past time round these parts) And as sad as I am to see it finish, its impact on modern design trends is undeniable. Even Target has come out with a range of Vintage Modern homewares and furnishings. Which is lovely, but to me, nothing beats an original piece. A sumptuous lava drip glazed lamp from the 50’s, a walnut end table from the 60’s…these things sing to me in a way that a replica can’t.
Of course much of the time spent watching each episode of Mad Men was spent coveting the gorgeous furnishings and backdrops. From divine credenzas to burnt orange sofas to atomic ashtrays and bronze crane statuettes, it was Mid Century perfection. Oh to be a set designer on Mad Men!
Mad Men – so much swoon!
I seem to do this a lot. Another perfect example recently was Hitchcock’s 1958 movie “Vertigo”. Yes, the movie is visually stunning and the story captivates, but it was the little details that grabbed my attention. The coffee percolator in James Stewart’s apartment, the cocktail glasses in the restaurant, a pin on Kim Novak’s coat. All eye candy for the accessory obsessed. It’s not lost on me that a good portion of the movie was spent trying to determine the manufacturer of the white chair in Midge’s apartment – was it Woodard or was it Knoll – rather than following the storyline. It’s a bad case of mid-mod design ADD.
Vertigo
But…surely I can’t be the only one? What movies have hit you in the design bone? What movie or TV set would you love to ransack? Or replicate? We’d love to know!
We love hearing from people that have purchased our treasures, and this time is no exception. This amazing Lustro-ware kitchen canister set found a new home for itself and looks just fab (especially right next to that sweet retro coffee maker!) We love the gold lettering on the creamy white background.
Lustro-ware was hugely popular in the 1950’s & 60’s, and found in kitchens across America. Their canister sets covered all the bases for dry goods – bread, flour, tea, coffee, sugar, cookies & more. But Lustro-ware didn’t stop at canisters, they had household items galore, from wastebaskets to juice squeezers to ice buckets and everything in between.
If you’ve purchased something from us that you’d like to share, we’d love to see it in its new home! Email us a photo here
For more Lustro-ware items, as well as a selection of kitchen canisters by Mirro, WestBend & others, check out our store.
There’s lots going on here at Atomic Magpie! We have a number of fantastic mid-century furniture makeover projects underway, and we are really excited to share them – just as soon as the paint is stripped, the stain is set and the brass polished.
Also on the horizon are some amazing new finds fresh from Australia. They landed Stateside last week, and will be hitting our store in the coming weeks. Our magnificent vintage treasures include a stunning enameled cookware pair by Siltal of Italy, a retro-fabulous red ice bucket by Decor Australia, an AGEE Pyrex bowl and some other absolute gems. We’ll be sure to post more info once we have them listed in our store!
In the mean time, we’re going to share with you this sweet trio (or “a pair & a spare” as we like to say) of coffee mugs by Arcoroc of France. The are tres’ chic, and feature one of our most favorite colors – turquoise. In the popular Jardiniere design, featuring ribbed rings around the mugs, these tempered beauties are fab!
Every now and again we come across a piece that makes us swoon. This lamp did just that. With its textured base, featuring gorgeous orange and gold diamond shaped detailing, and stunning walnut neck, this mid-century beauty is absolutely fantastic.
We have several fabulous lamps hitting our store in the coming weeks, be sure to stay tuned.
Sarah from Atomic Magpie scored this sweet but battle scarred end table and transformed it into a thing of beauty. Here’s how she did it.
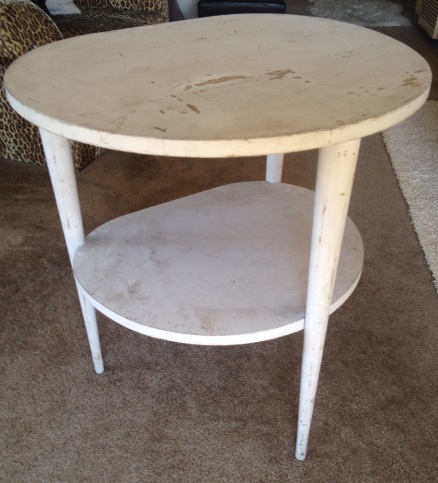
A few weeks back I found this beat up little end table on a local swap and sell site. Wedged in a corner, covered in office junk, paint scratched and dirty, and looking generally pretty sad. To many, not worth a second glance…but those legs! One look at the tapered legs, and this table screamed out “buy me! Save me! I am fabulous waiting to happen!” and I knew it had to be my next project.
Before, sad and dingy
I determined pretty quickly that the table was solid wood, covered with layers of lousy paint jobs over the original varnish. So I set about stripping the layers of dirt, paint and stain off, and uncovered a few little surprises along the way. The first happy surprise I unearthed was the brass ferrules on the feet of the table. Covered in decades of paint, these beauties were the cause of great excitement. A staple of mid-century design, I adore brass tipped table legs, and these ones were fantastic.
Oh the joy! Brass Ferrules
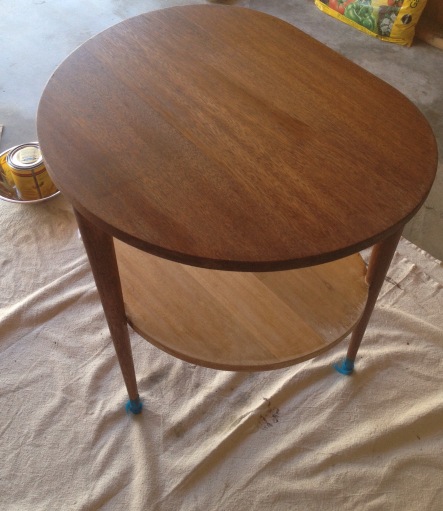
Next up, after stripping the top using an Eco-friendly, low fume paint stripper that I was able to use indoors (EZ Strip, Paint & Varnish Stripper) I found that I had in front of me a gorgeous mahogany table top, with a few water stains here and there, but nothing some sanding couldn’t remedy. The legs were a bit more work, requiring a lot of elbow grease, paint stripper and a wire brush. But it got there, and soon I had before me a stripped clean wooden end table with endless possibilities.
Uncovered – water stains and Mahogany
I sanded the whole table using a handheld block sander with 100 grit sandpaper. I finished with a fine sandpaper (220 grit) The good condition of the wood, and the stunning grain, made it an easy choice for staining rather than painting. I chose Minwax Special Walnut as the stain, and used a lint free rag to wipe it on, and then off. I did about 6 coats to get the colour I wanted, and had a couple of minor hiccups along the way, mostly with the legs and some small spots of old varnish I had missed. A quick go over with sandpaper on those spots, a touch more stain and the problem was solved.
Stripped and one coat of stain down
Early on, it was decided a pop of color would really make this table shine. Wanting to stick with the mid-century feel of the table, I chose a vibrant Aqua blue paint for the bottom shelf (Island Oasis by Home Depot, in matte/flat finish)
A quick coat of Minwax polyurethane over the whole table, and the old ketchup trick to polish the brass ferrules, and the end result was quite stunning.