It’s no secret we love a good vintage lamp round here, and with so many different mid century styles to choose from, accent lamps are a great way to jazz up a room or change up a space.
We’ve sold some gems in 2015, and currently have more in our store. So in honor of Christmas lights and all things bright, here are some of our favorites from this year!
Recently, I was lucky enough to snag a trio of vintage Tulip style chairs for a steal. They were rusty, dirty and scuffed and needed a lot of love but, with bones like these, impossible to resist. Widely considered to be a classic of industrial design, the Tulip chair was designed by Finnish born designer Eero Saarinen in the mid 1950’s for Knoll. The smooth, modern lines of this chair have made it an iconic mid-century piece, and one I could not pass up.
Before, the “for sale” picMore before!
After giving the chairs a good look over, I realized that the fiberglass uppers were actually in pretty decent shape and mostly just in need of a really thorough cleaning. That said, it was a good hour of scrubbing and buffing to get them into tip top shape. I started with a little regular kitchen cleaner to get the first layer of grime off, I then followed up with a magic eraser. Which lived up to its name! The chairs were shiny in no time.
Clean and shiny. The holes are where the seat pads attach…more on that later.
The metal bases were another story – covered in rust and dings. Thankfully the rust was only surface deep and hadn’t eroded any of the metal too seriously. I started by sanding them (wearing a breathing mask of course!) with a coarse 100 grit sandpaper, which removed most of the obvious rust. I followed up with a 220 grit to smooth it all out. In between I used a wet rag to wipe away the rust and dirt that was coming off. Some parts of the bare metal were exposed, but I was able to get a smooth surface pretty easily.
Close up of the base
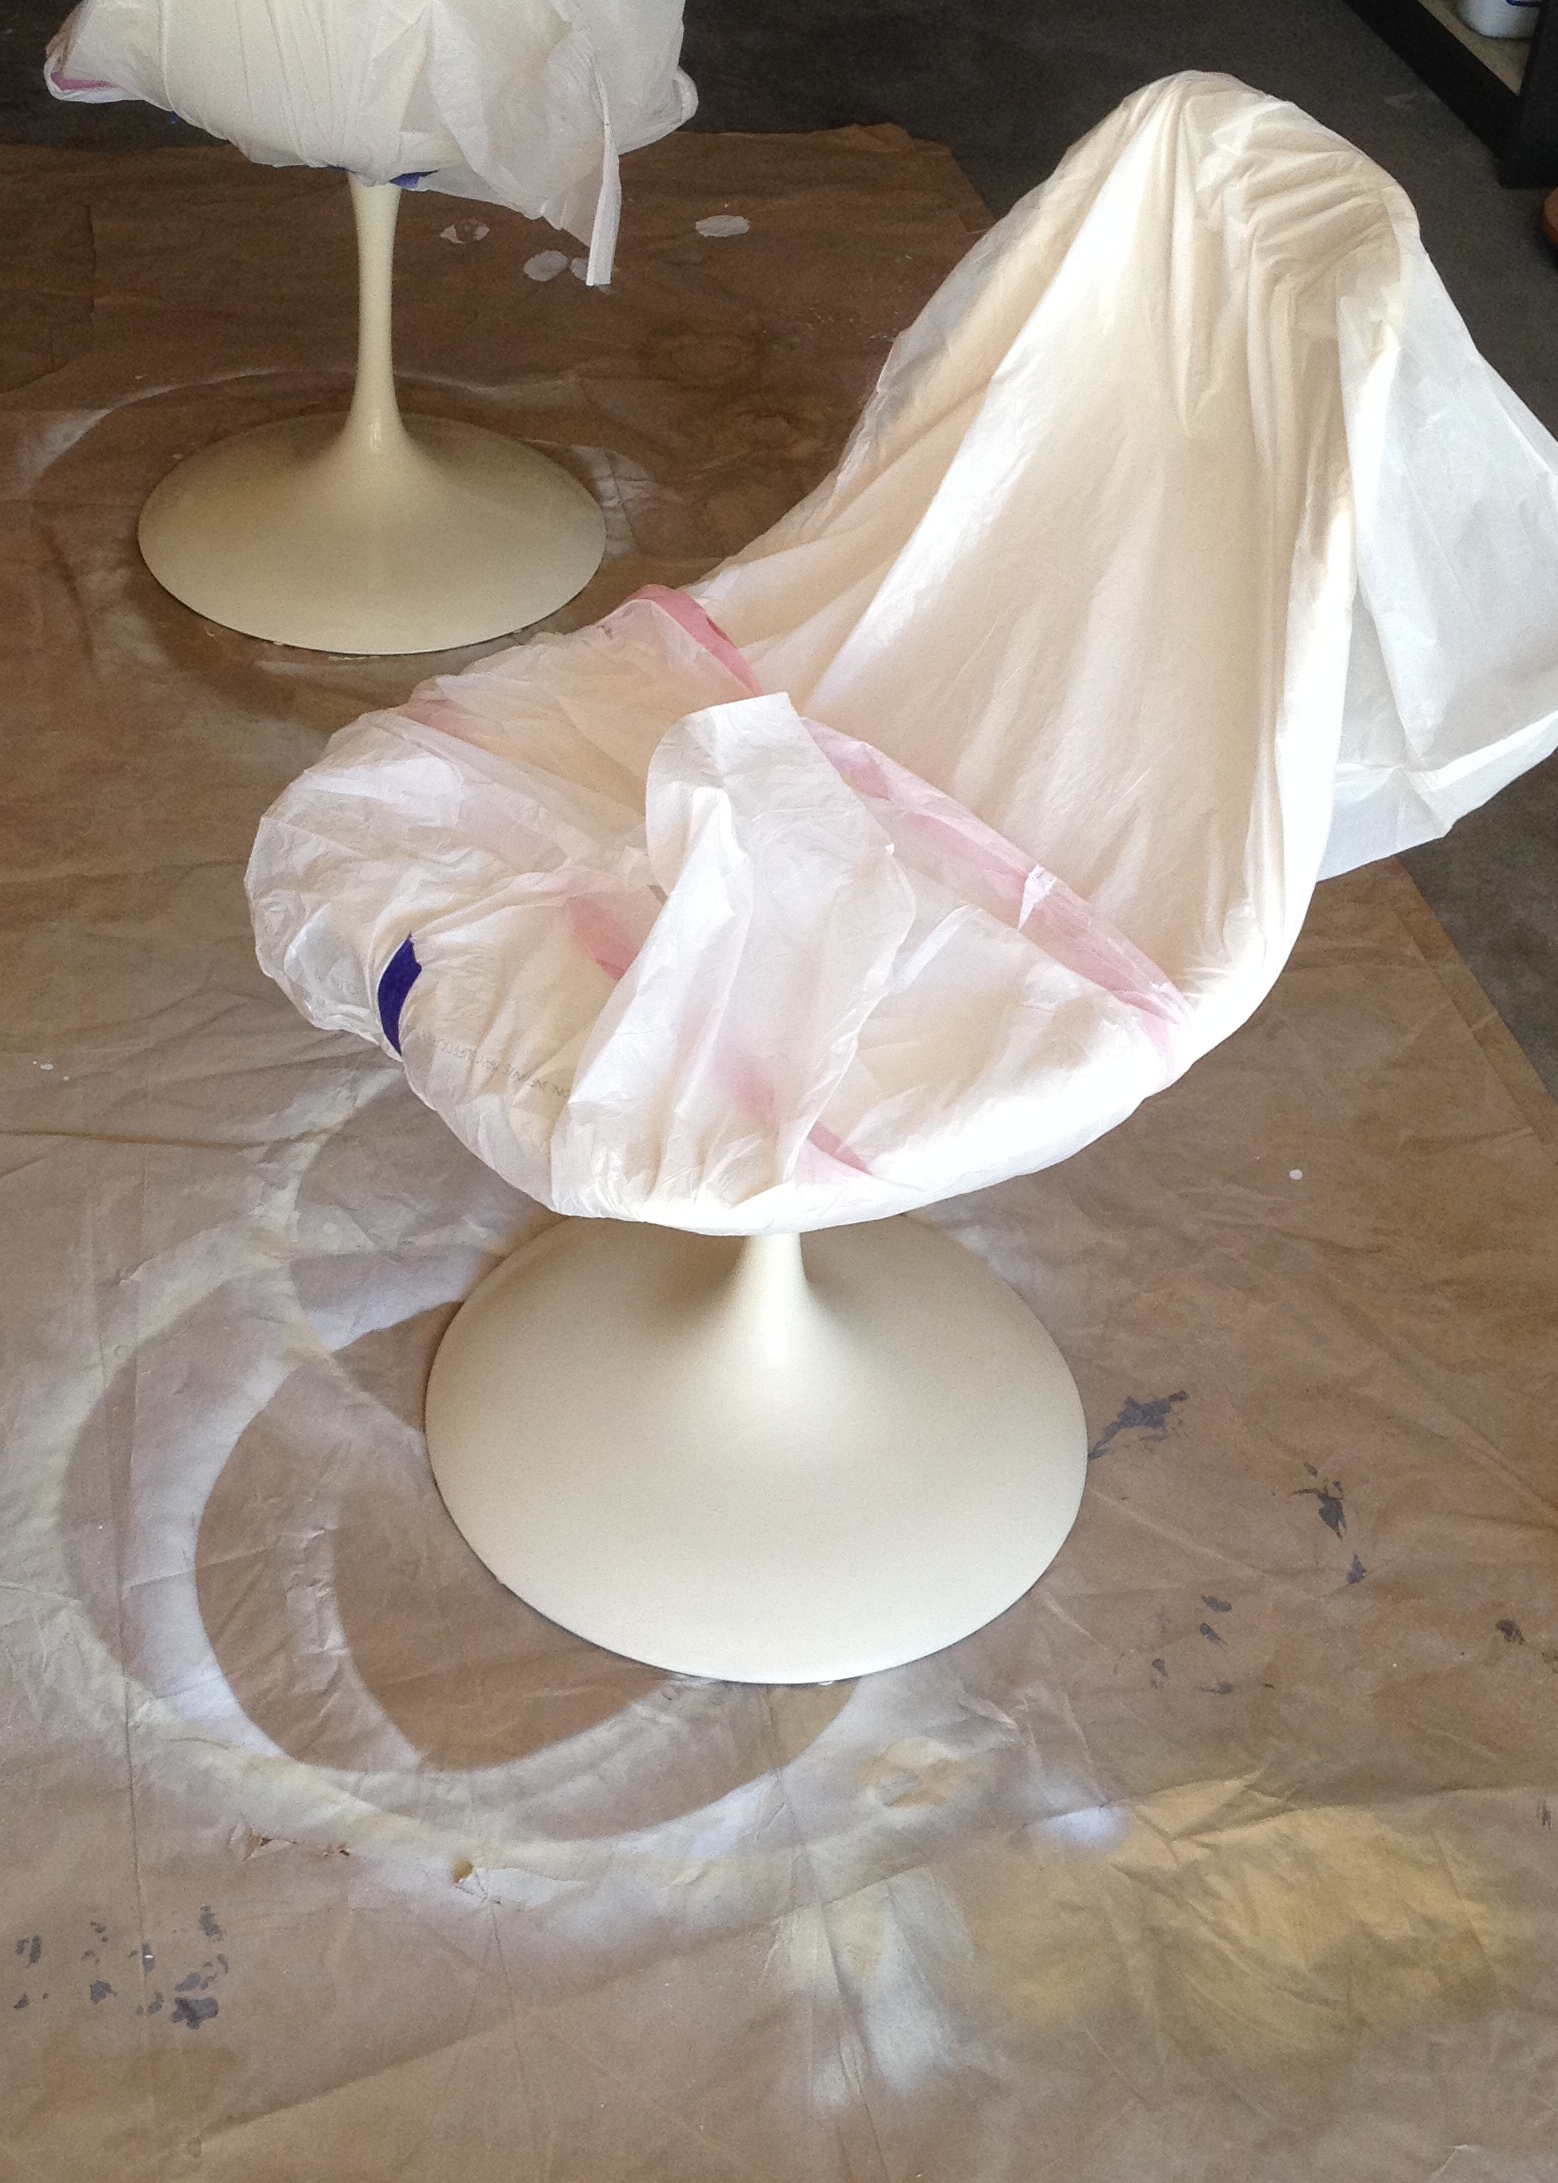
In much of my research of restoring tulip chairs I had read about the difficulties many people had faced with getting the bases back on the seats after removing them, so I opted not to take them off, and instead covered the seats. This was mostly because I get frustrated by mechanical things easily and knew I would probably struggle to get them back on in a timely manner. I’m also rather impatient. So trash bags and painters tape it was, and this worked perfectly.
High end paint protection
I then primed the bases using “Killz” spray on primer containing rust protection. After letting this dry, I used Krylon’s prime and paint in one, in Ivory. My only advice here is DO NOT USE KRYLON spray paint. I followed the instructions to the T, I shook the can for a good two minutes and the paint came out lumpy. Like little sand granule sized lumps. Freak out, lose my mind, lumpy. So, I had to let this dry completely and sand it off and start the process over (cursing Krylon’s name the whole time). Once I was back to square one, I used my old trusty Rustoleum Heirloom White. This was MUCH BETTER and I should have stuck with what I knew. Lesson learned.
One coat down
I did 3 light coats of paint, letting each one properly dry in between. I’ve learned over the course of a few projects that when it comes to spray painting, the best finish comes from multiple light layers, as opposed to drowning the first layer. Of course, I’ve read this a million times, but had to learn it for myself. So, take my word for it, it’s true. Once it was fully dried (I let it sit for 24 hours) I went over with a final layer of Rustoleum’s spray on Ultra cover clear gloss.
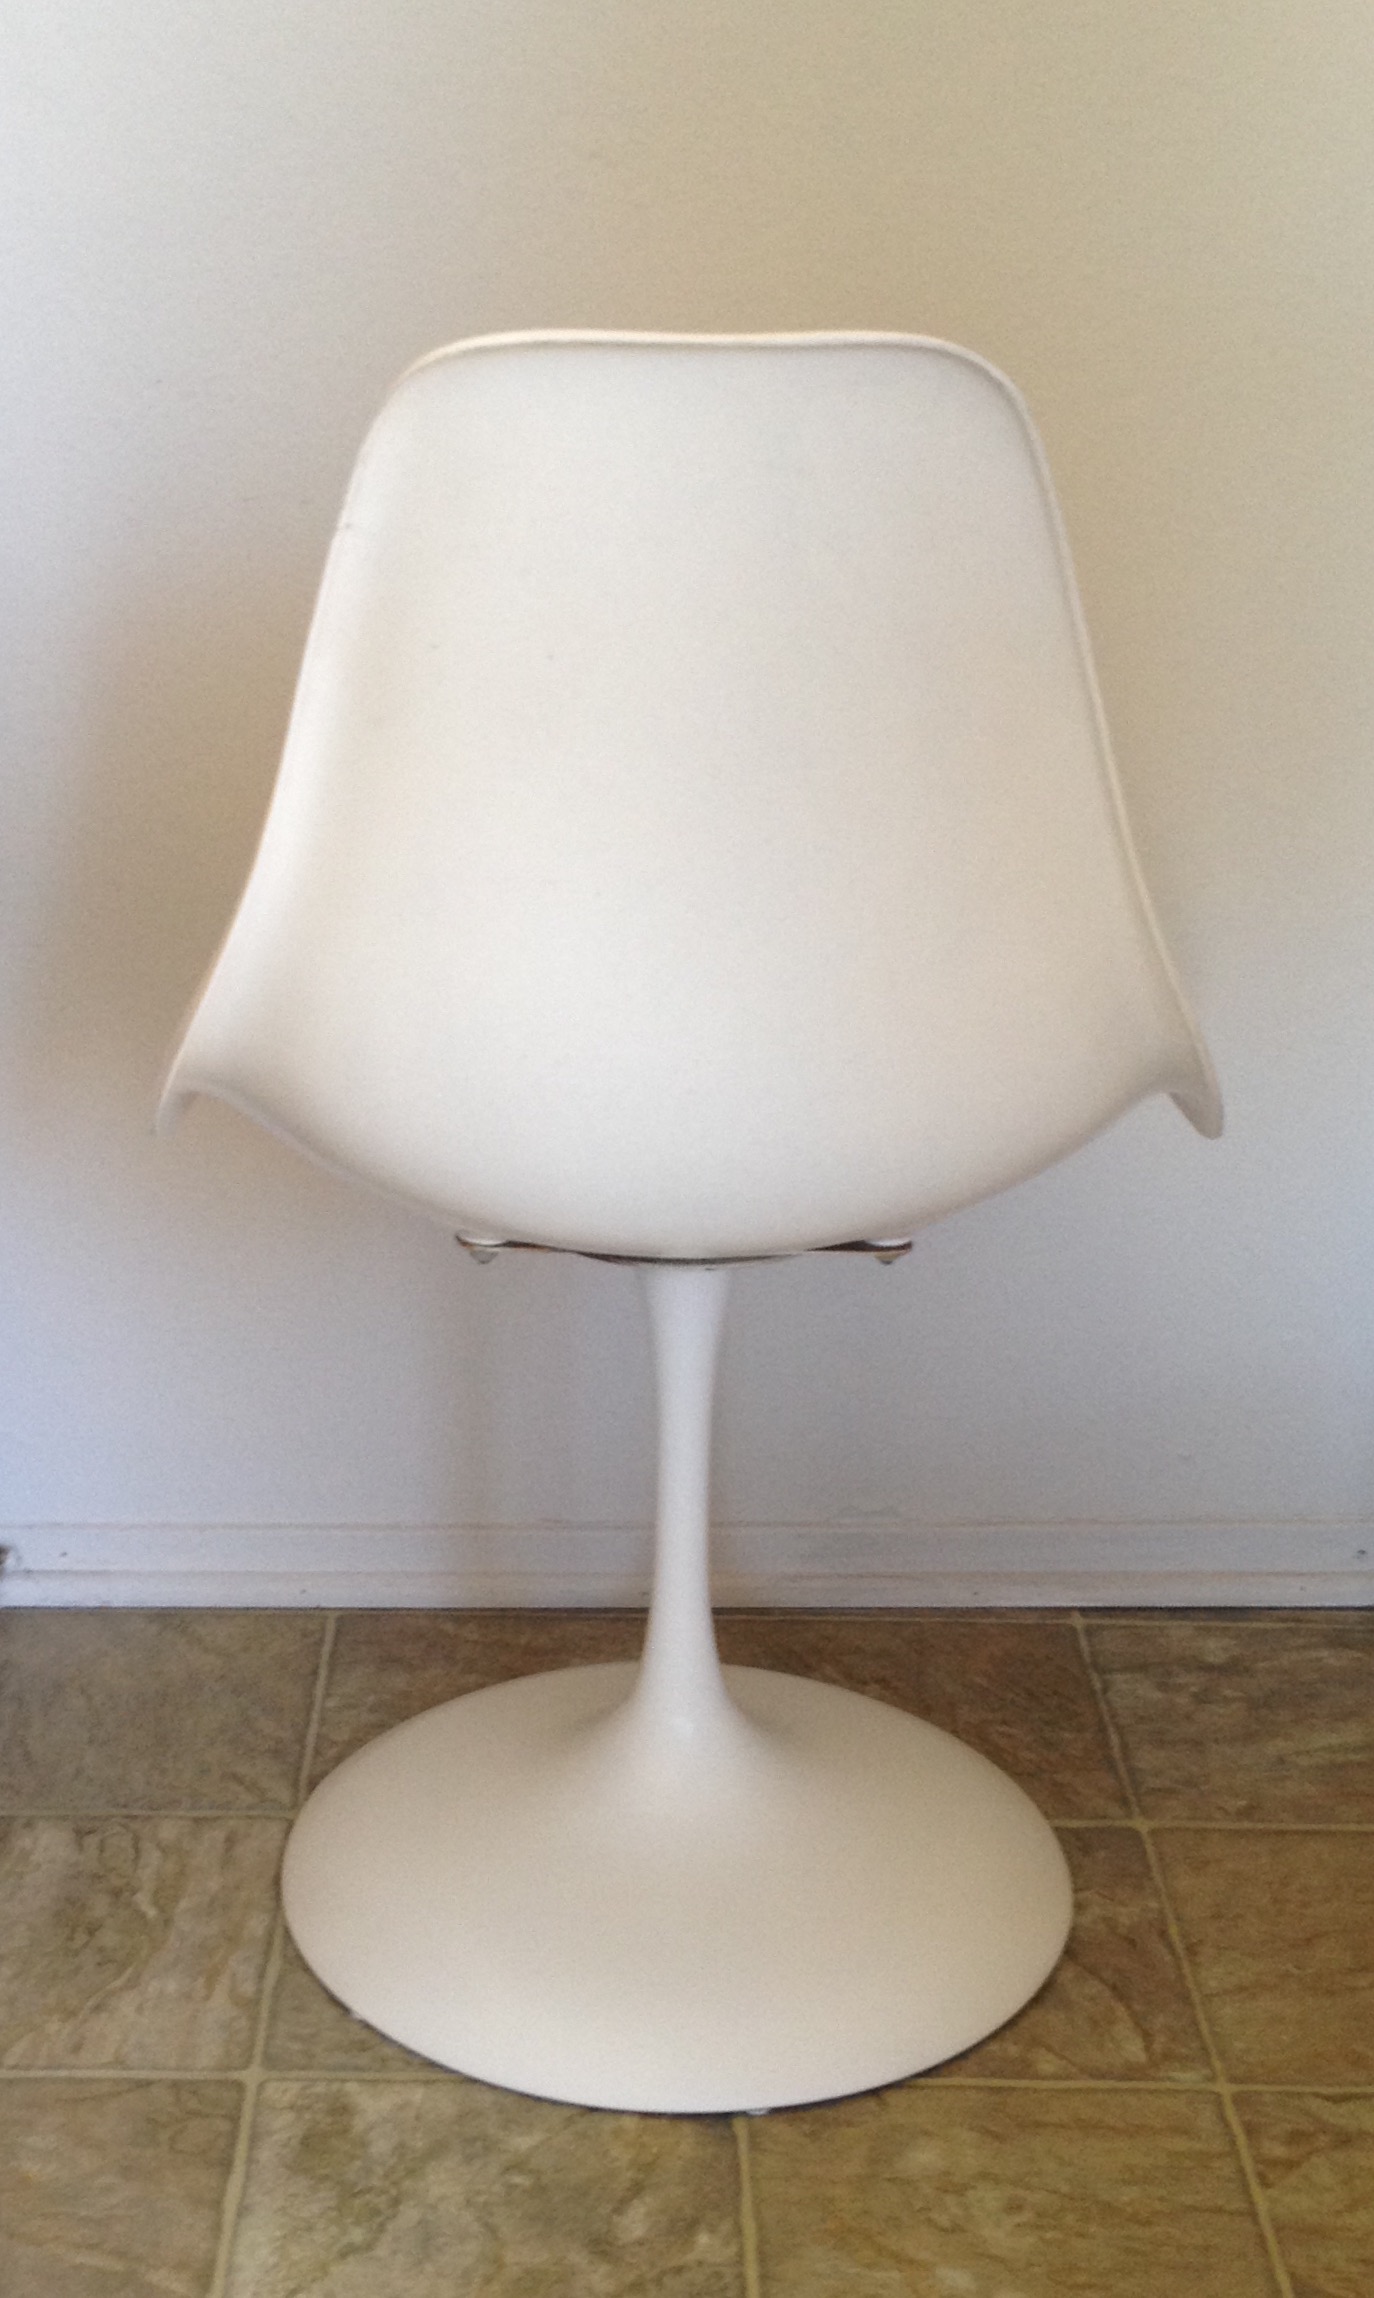
Finished!
So here is the mostly finished result. These chair pads aren’t the ones I’m going to ultimately use, they’re a temporary fix until the proper ones are finished. I just couldn’t wait to share, but will update the pics as soon as the new pads are complete.
Like our favorite blue monster, we have our share of cookie fanatics around here, and what better way to fabulously display and store glorious cookies, than this mod-tastic cookie jar! Made in the USA, with a whopping 3 liter capacity, we just love this vintage gem.
Itching to revamp something, this little table was basically a throw away I decided to play with. Nothing vintage about it, this particle board decorator table was plain, ugly and pretty hopeless, so with little to lose I went to town.
Before. An old, cheap throw away.
I removed the legs, the only real wood component, and lightly sanded the pressed wood table top. It had some raised water damaged spots, so I knew painting wouldn’t be enough to fix it. The trim was plastic faux wood, also virtually impossible to do much with. I used Kilz Spray on Primer to prime the table top and trim.
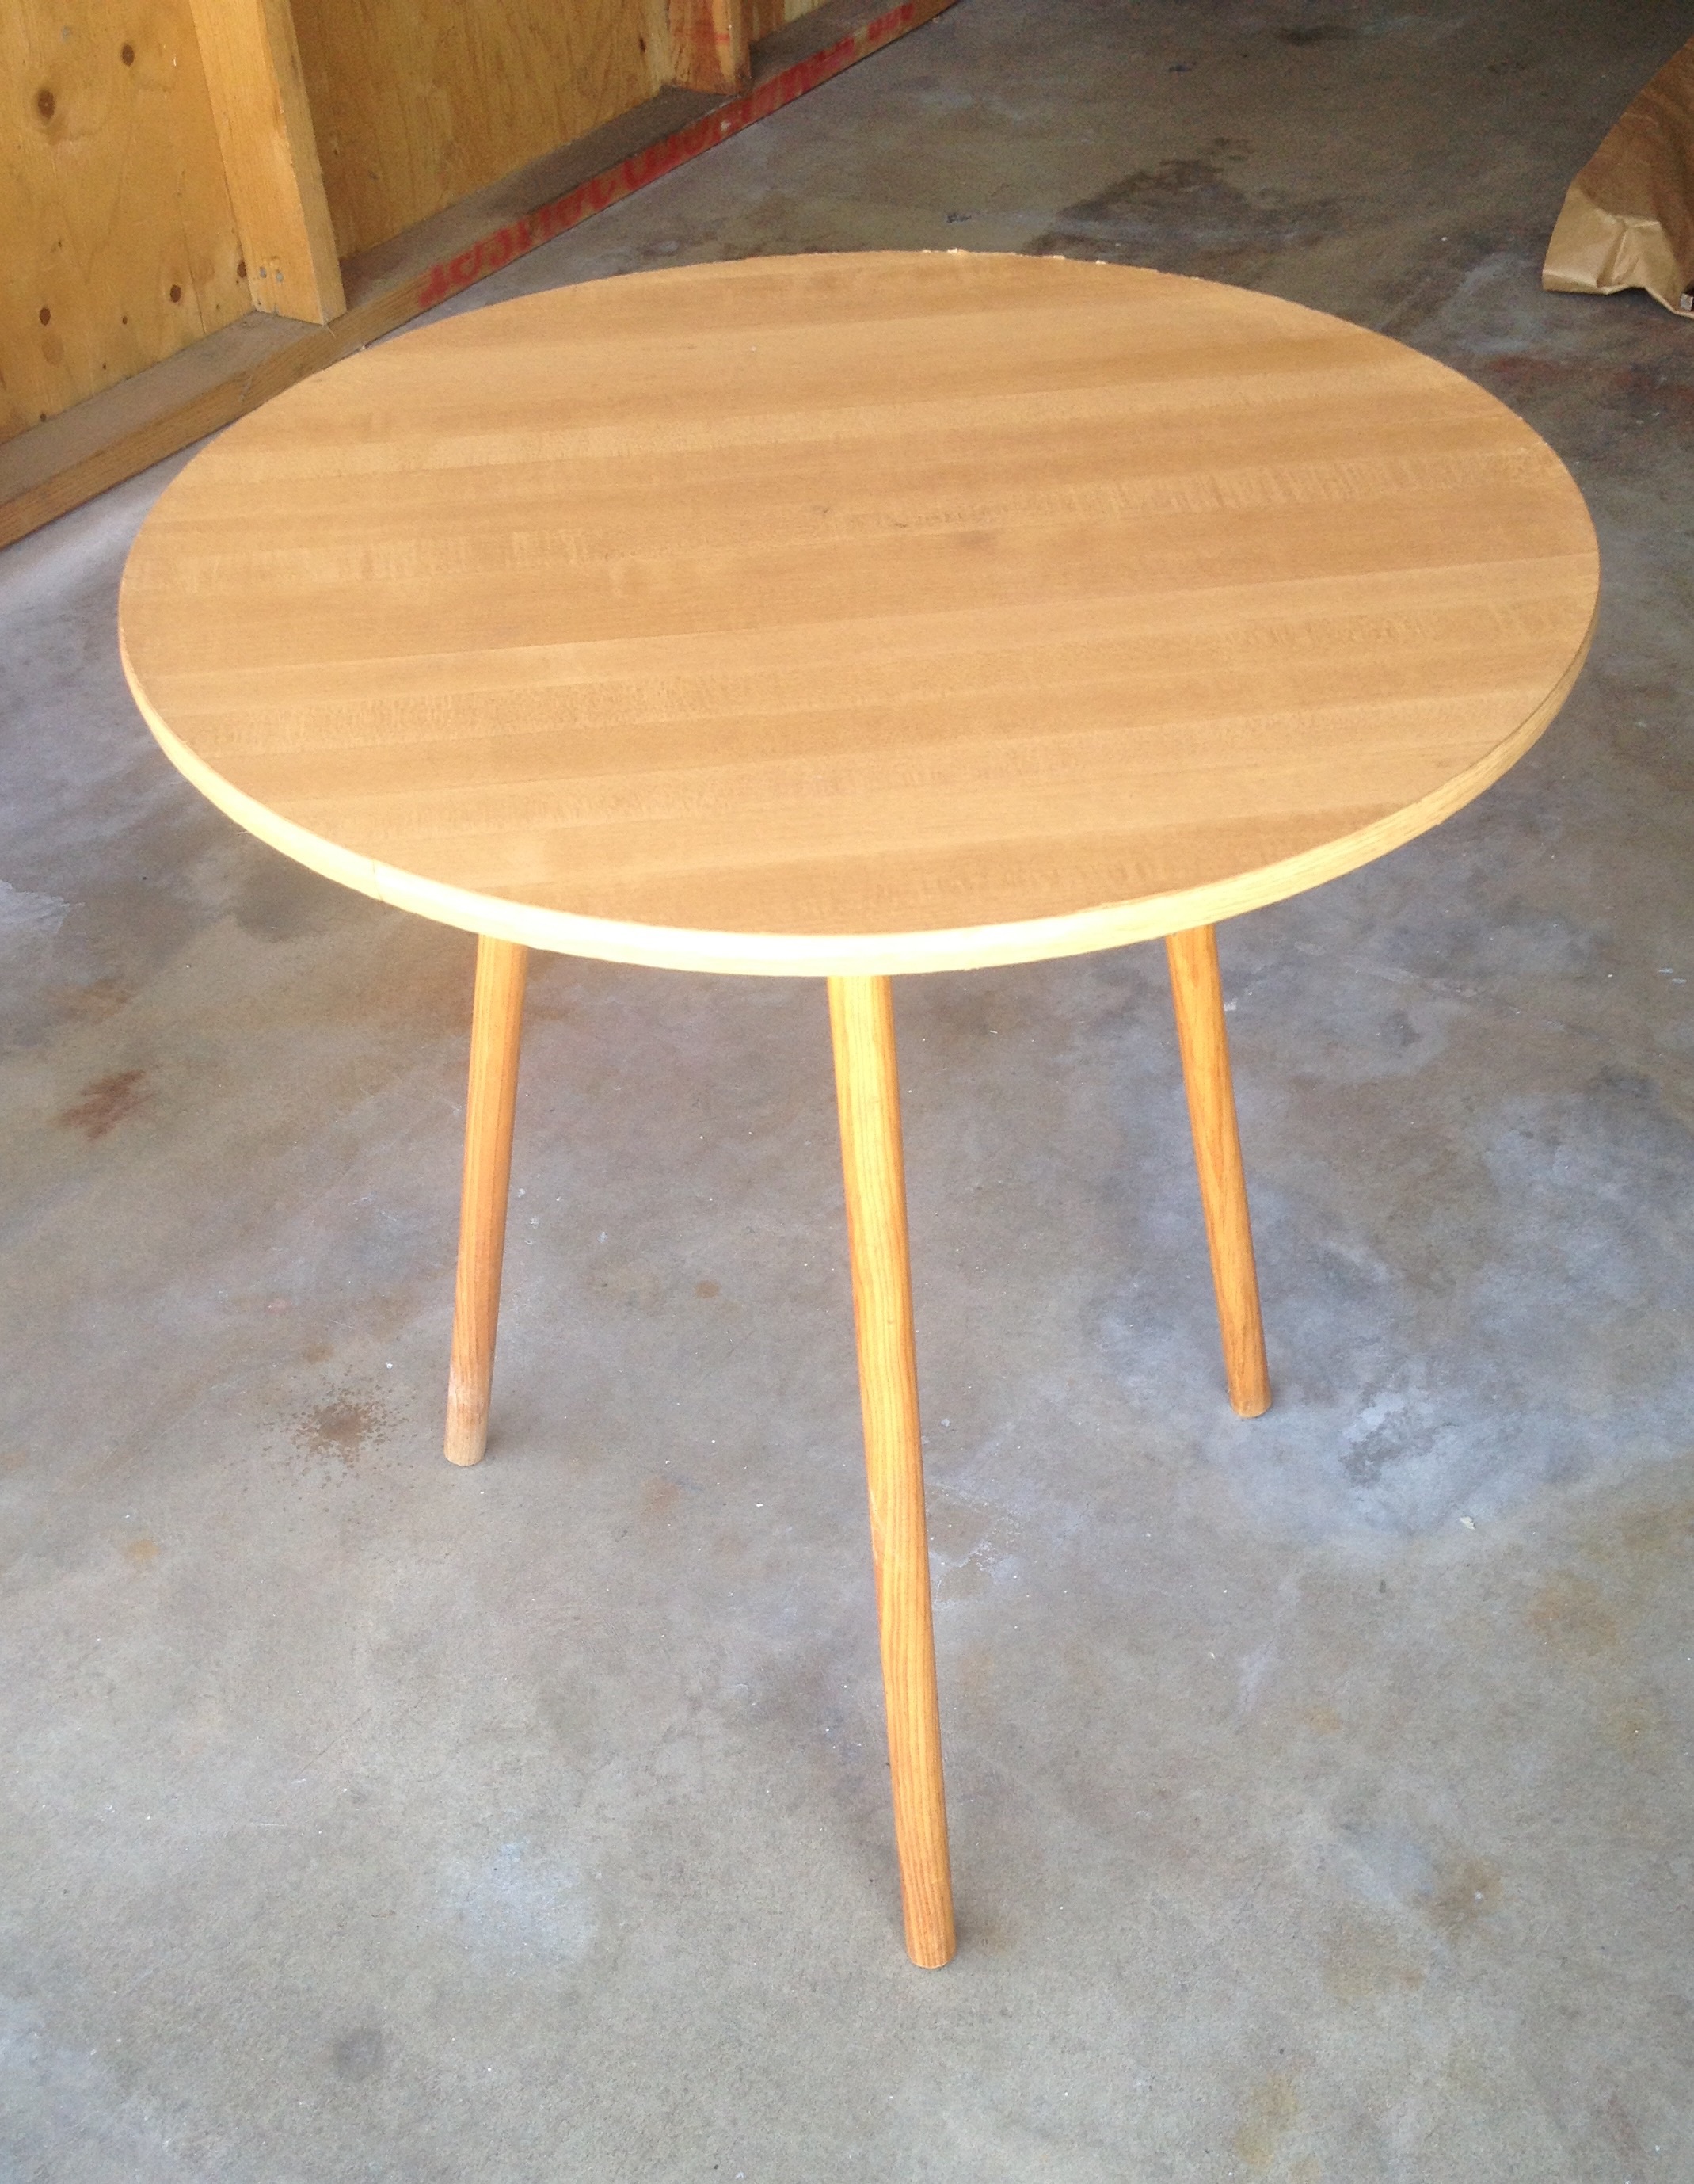
Primed and ready to go
While that dried, I sanded the legs and used Minwax Gel stain in Hickory to stain them a lovely rich color. I’m obsessed with gel stain since it saved my last makeover project from disaster. It just goes on so smoothly, with little prep and still lets the gorgeous wood-grain shine through.
Legs stained
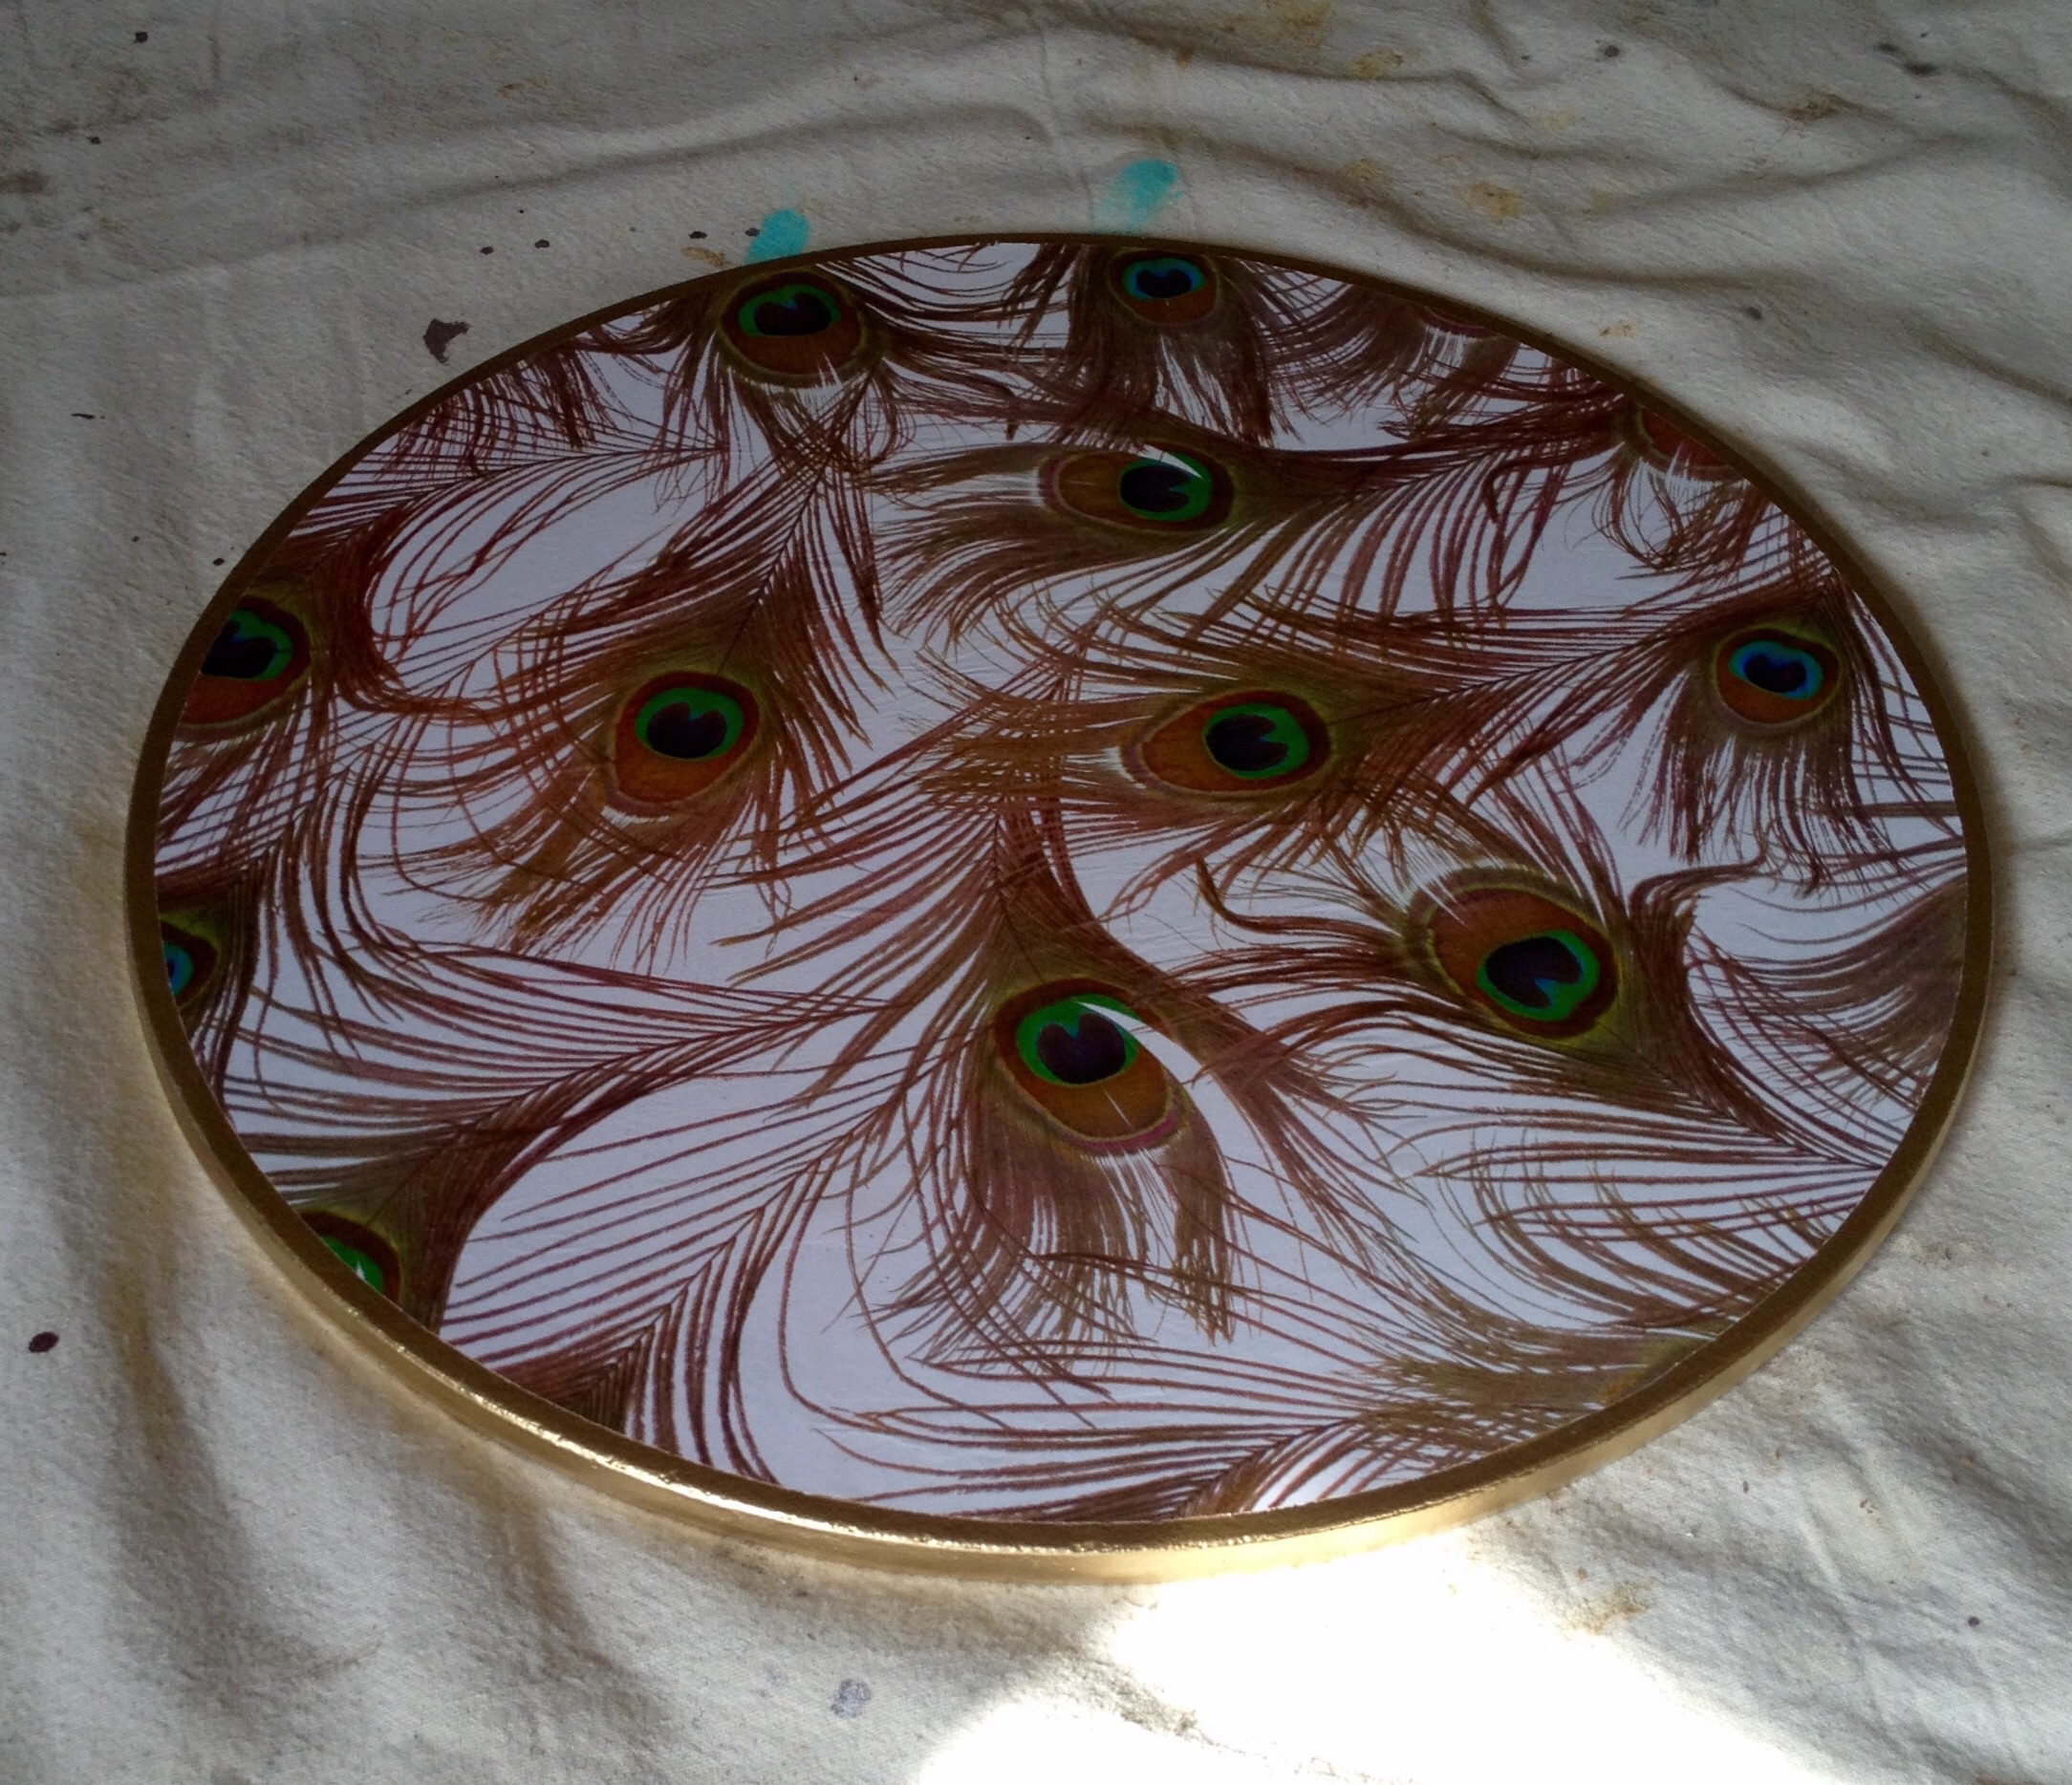
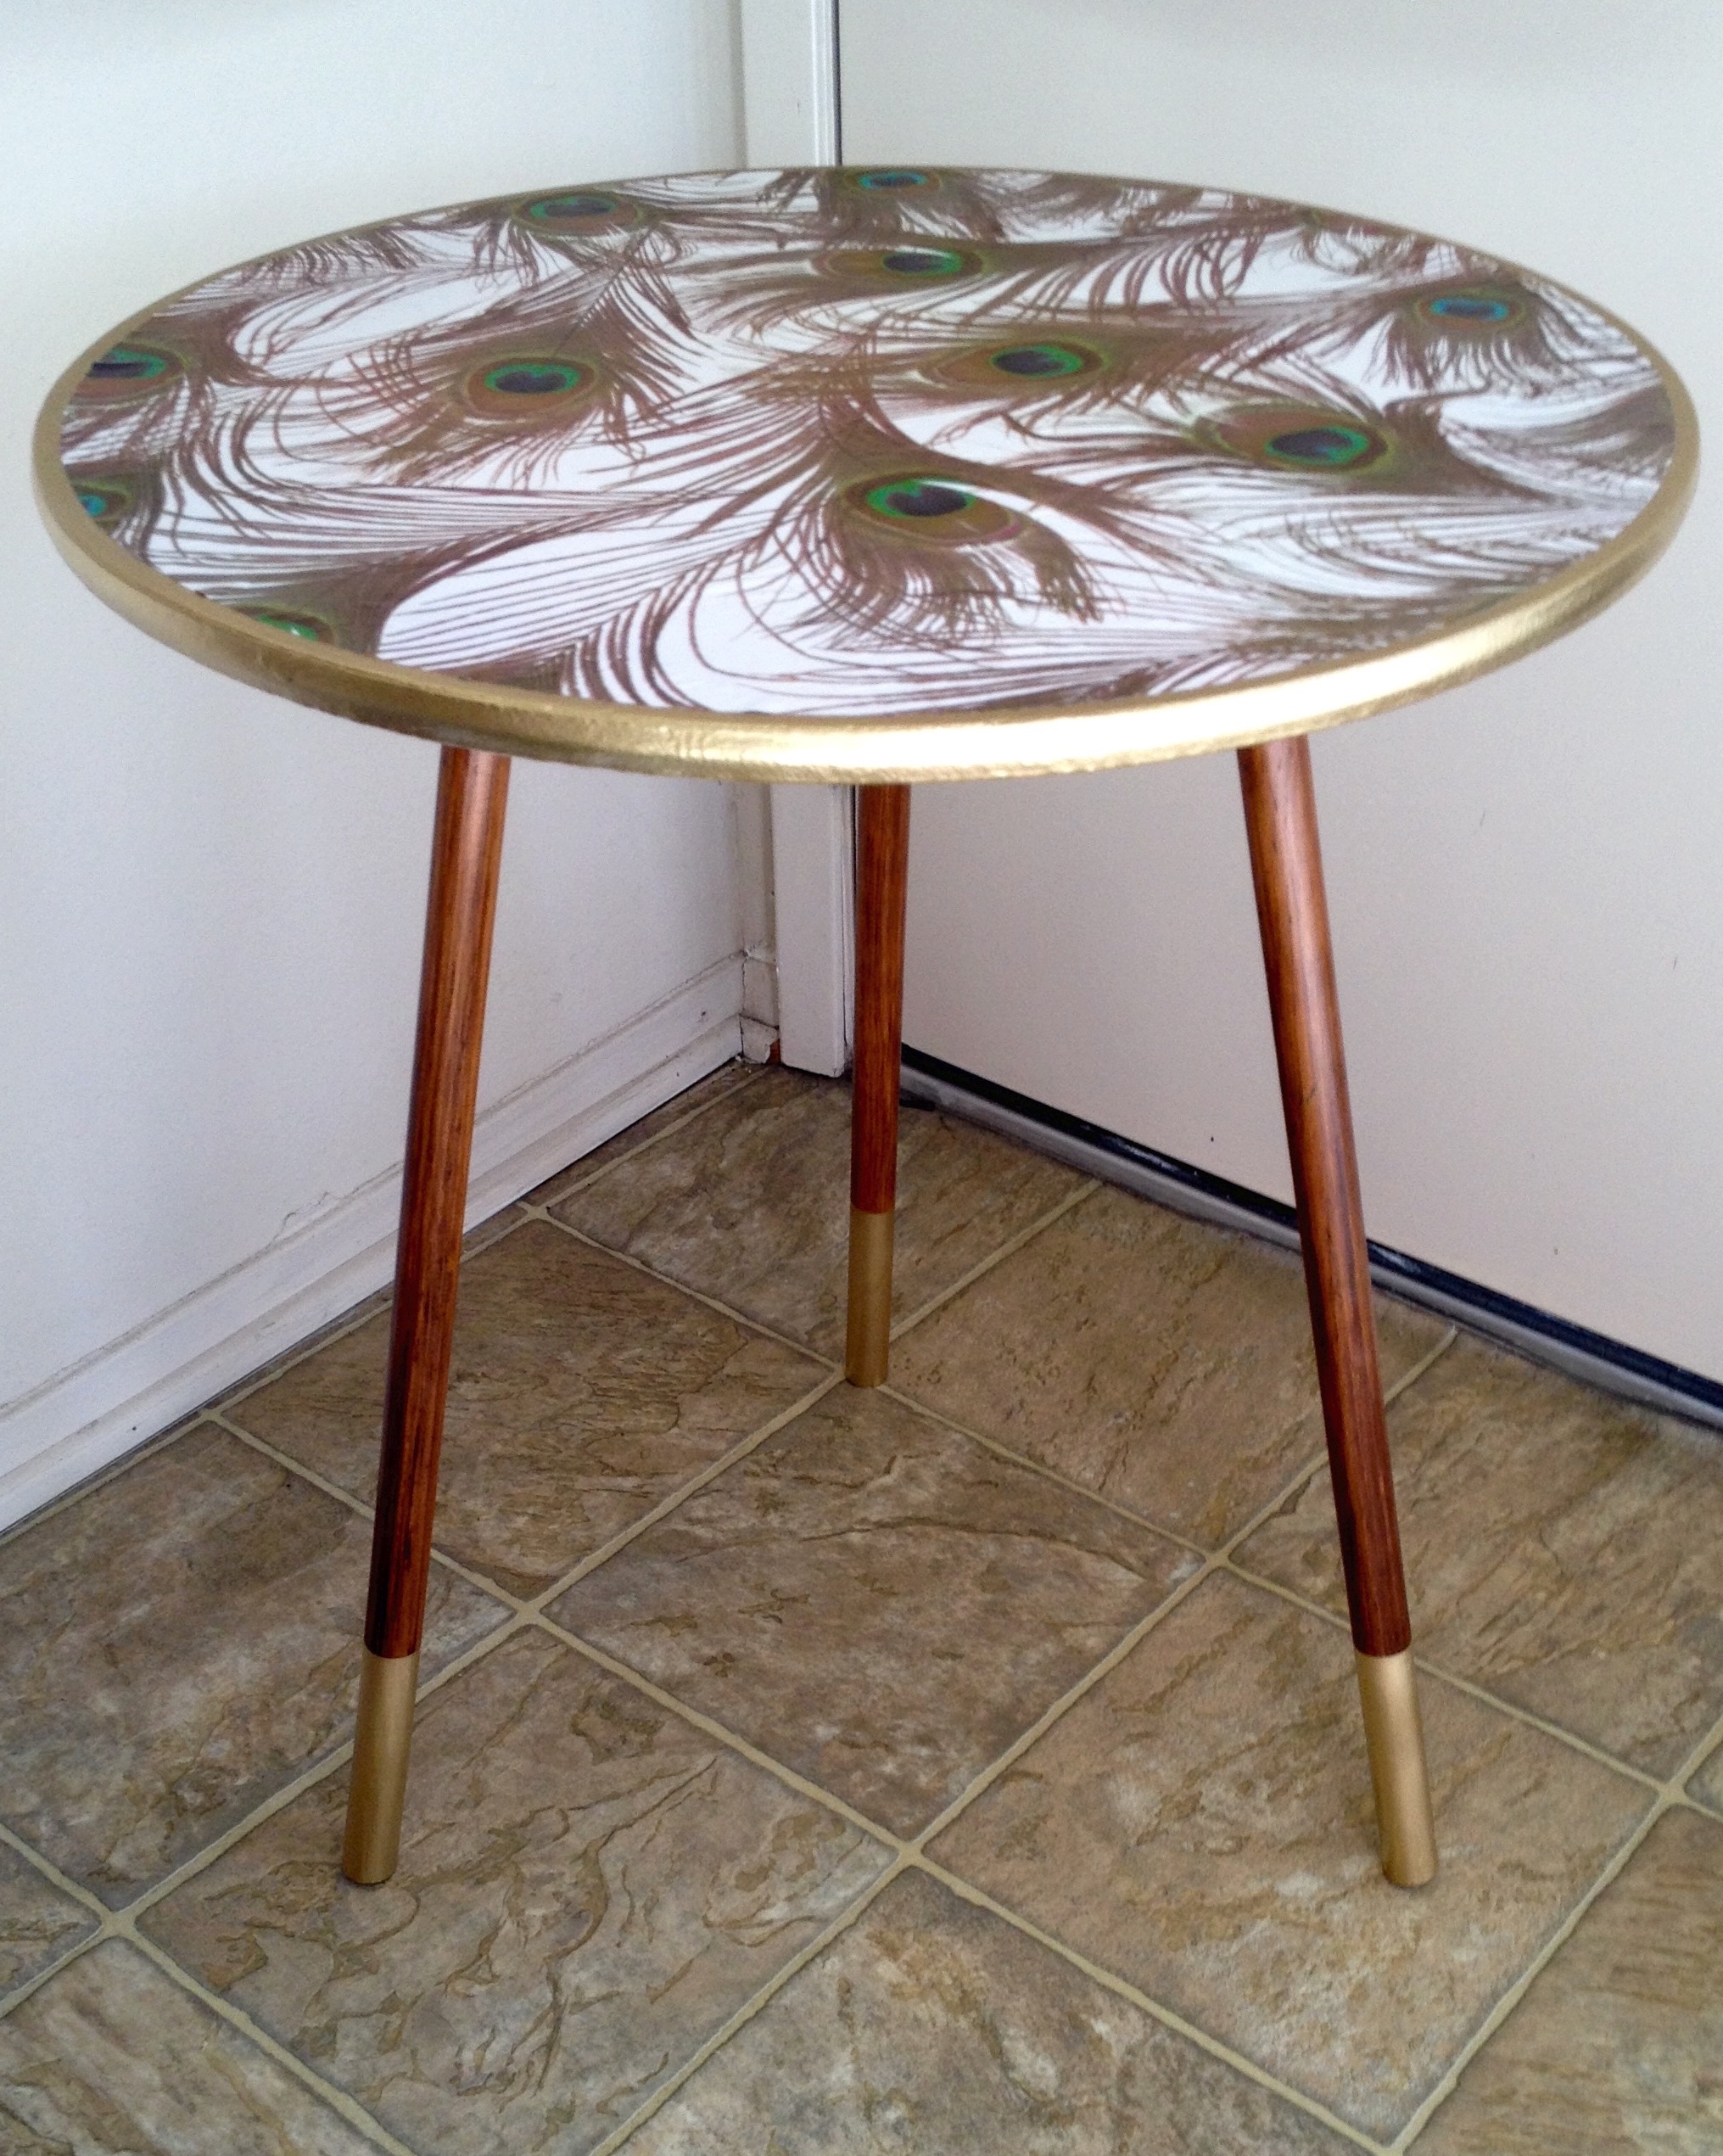
I used Rustoleum’s Gold Metallic paint to spray the trim and edge of the table top. I did two light coats and 24 hours later I used Mod Podge to affix some awesome peacock paper I had to the table top. I did 3 layers of Mod Podge on top of the paper, and on the side trim to seal it. This was my first time using Mod Podge, and even though I had followed the instructions and used a credit card to smooth the paper after adhering it, I had a little freak out moment when the paper appeared bubbly with tons of air pockets after the first coat. Not really knowing what to do next, I left it to dry over night, and was thrilled to see that once it had dried, all bubbles had vanished.
Mod Podge and Peacock paper perfection
As a final little touch, I decided to pay homage to mid century table legs and I taped off the bottom of the legs and used the gold spray to create the look of metal ferrules (leg caps). A nice little cheat that turned out wonderfully.
Fake it til you make it!
So there you have it, a quick and easy table makeover that turned the dumpster table into a fabulous, feathery showpiece.
What a great idea! We just love seeing items being used for things beyond their original purpose. Take this fantastic David Douglas designed 1960’s coffee pot – looks perfect holding fruit and herb infused water at a summer party. Delish!
For more great mid century coffee pots, visit our store!
Once in a while I come across a makeover project that makes me think “oh, easy!” and this little sewing cabinet was no exception. I mean, lots of flat surfaces and straight lines, an easy strip, stain and seal and “Bob’s your uncle!” Well, no. Not this time. I loved this little table from the get-go, I hated it for moments, but in the end, I’m still enamored. That top drawer that flips around to hold bobbins and reels, so unusual and unique. Hard to pass up.
So unique!
It wasn’t the 50 years of peeling paint underneath that was work, it was the freshest coat that had been slapped on top recently to cover it that made this project a sticky, messy nightmare. And all those straight lines? Hmm, yes, well, except for the grooves on the trim. The MANY grooves on the trim. Not fun. And then there’s the drawer fronts. Yep, they’re flat alright, flat…but textured. With this odd layer of some kind of raffia or thatched laminate stuff. Stripping wasn’t even an option for those parts.
So many layers!
So to say the prep was difficult, is an understatement. This wee gem took days of paint stripping, and for moments, a little piece of my soul. Then, those grooves…well, I tried everything from scrapers to wire brushes to steel wool to skewers. I finally got there, but in hindsight, sandblasting would have been the more effective option. Note to self.
Groovy. But not really.
Next up, sanding. This part was the easiest of all. My snazzy Black & Decker orbital sander whizzed through and made the surface silky smooth in a jiffy. Things were looking up, because the last step in front of me, staining, is the easiest thing ever, right? I tried Minwax stain in Special Walnut, it’s a favorite of mine. And do you think this wood would take the stain? Oh puhlease, no way. Admittedly, there were two types of wood in this cabinet, and in my enthusiasm I didn’t consider the impact this may have on the staining process….which was evidently huge. So the stain on top looked great, on the sides looked OK, and on the front, looked awful. It was a patchy, streaky mess, no matter what I tried.
Sanding = the only easy part
It was at this point I went back to the trusty internet and this is where Gel Stain SAVED THE DAY. Gel stain, unlike traditional stain, is more like a paint. So it doesn’t soak into the wood, it sits on the surface. It’s a similar process, wipe on, wipe off, but the result was perfection. I used Minwax Gel stain in Hickory, and it was a rich, gorgeous tone that still let the wood grain shine through. Most importantly, it was even, smooth and consistent. Not a streak in sight. This stuff is GLORIOUS.
Gel Stain saves the day
The last step was the drawer fronts which, as mentioned earlier, were this weird textured stuff which I actually kinda liked the look of, but wasn’t able to strip or stain (or remove completely without having to replace the entire face of the drawers. More effort than I was willing to put in at this point). So I painted. I had some amazing aqua blue “Island Oasis” paint left over from a table makeover, so I used that. A couple of chrome drawer knobs later, and a coat of Minwax polyurethane to seal the whole thing, and the cabinet looks stunning.
Aqua & Chrome. Swoon!
Worth the labor intensive process (I can say that now it’s over and I’m not knee deep in paint stripper and desperation)
My love of all things Mid Century left me with little choice but to get sucked into the vortex that was Mad Men (binge watching TV series on Netflix is a favorite past time round these parts) And as sad as I am to see it finish, its impact on modern design trends is undeniable. Even Target has come out with a range of Vintage Modern homewares and furnishings. Which is lovely, but to me, nothing beats an original piece. A sumptuous lava drip glazed lamp from the 50’s, a walnut end table from the 60’s…these things sing to me in a way that a replica can’t.
Of course much of the time spent watching each episode of Mad Men was spent coveting the gorgeous furnishings and backdrops. From divine credenzas to burnt orange sofas to atomic ashtrays and bronze crane statuettes, it was Mid Century perfection. Oh to be a set designer on Mad Men!
Mad Men – so much swoon!
I seem to do this a lot. Another perfect example recently was Hitchcock’s 1958 movie “Vertigo”. Yes, the movie is visually stunning and the story captivates, but it was the little details that grabbed my attention. The coffee percolator in James Stewart’s apartment, the cocktail glasses in the restaurant, a pin on Kim Novak’s coat. All eye candy for the accessory obsessed. It’s not lost on me that a good portion of the movie was spent trying to determine the manufacturer of the white chair in Midge’s apartment – was it Woodard or was it Knoll – rather than following the storyline. It’s a bad case of mid-mod design ADD.
Vertigo
But…surely I can’t be the only one? What movies have hit you in the design bone? What movie or TV set would you love to ransack? Or replicate? We’d love to know!
We love hearing from people that have purchased our treasures, and this time is no exception. This amazing Lustro-ware kitchen canister set found a new home for itself and looks just fab (especially right next to that sweet retro coffee maker!) We love the gold lettering on the creamy white background.
Lustro-ware was hugely popular in the 1950’s & 60’s, and found in kitchens across America. Their canister sets covered all the bases for dry goods – bread, flour, tea, coffee, sugar, cookies & more. But Lustro-ware didn’t stop at canisters, they had household items galore, from wastebaskets to juice squeezers to ice buckets and everything in between.
If you’ve purchased something from us that you’d like to share, we’d love to see it in its new home! Email us a photo here
For more Lustro-ware items, as well as a selection of kitchen canisters by Mirro, WestBend & others, check out our store.
There’s lots going on here at Atomic Magpie! We have a number of fantastic mid-century furniture makeover projects underway, and we are really excited to share them – just as soon as the paint is stripped, the stain is set and the brass polished.
Also on the horizon are some amazing new finds fresh from Australia. They landed Stateside last week, and will be hitting our store in the coming weeks. Our magnificent vintage treasures include a stunning enameled cookware pair by Siltal of Italy, a retro-fabulous red ice bucket by Decor Australia, an AGEE Pyrex bowl and some other absolute gems. We’ll be sure to post more info once we have them listed in our store!
In the mean time, we’re going to share with you this sweet trio (or “a pair & a spare” as we like to say) of coffee mugs by Arcoroc of France. The are tres’ chic, and feature one of our most favorite colors – turquoise. In the popular Jardiniere design, featuring ribbed rings around the mugs, these tempered beauties are fab!
Every now and again we come across a piece that makes us swoon. This lamp did just that. With its textured base, featuring gorgeous orange and gold diamond shaped detailing, and stunning walnut neck, this mid-century beauty is absolutely fantastic.
We have several fabulous lamps hitting our store in the coming weeks, be sure to stay tuned.