Comin’ out of the dark…

Submitted by Fletcher M, Minnesota.

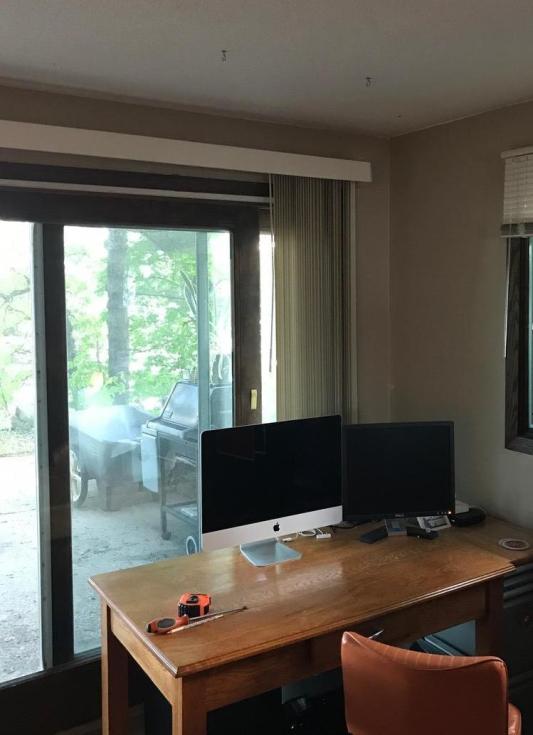
Living in a daylight basement in Central Minnesota, I had struggled to find a lighting solution for my “cave” that I found both functional and aesthetically pleasing. With an outlook onto a gorgeous lake, I had always positioned my work desk in front of the window, which was perfect during daytime hours, but offered no light fixture available in the immediate space during the evening hours. I needed a lighting solution that I could plug in, but also wanted it to hang from the ceiling and shine down on the work space, rather than be a floor lamp.

Before
Before

I’ve always loved mid-century pieces, particularly ones with a more industrial feel, so I had an idea in mind of what I was looking for and set out to find the perfect lamps. I found a pair of filthy hanging lamps, stashed away in my brother-in-laws shed, and knew I could rewire them and restore them to their former glory. They had originally come from an art studio, built in the early 1960’s, and were the exact mix of vintage and industrial I was looking for.

Before lamps
Circa 1960’s enamel lamps – Before


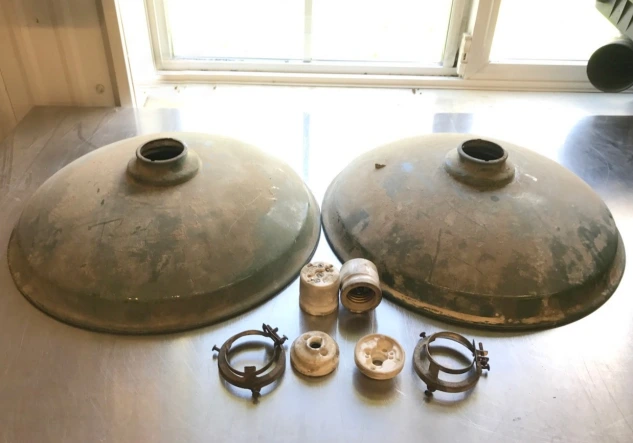
After cleaning off decades of grime, the enamel finish shone, and there was very little damage to the original finish.

After lamps
After! Cleaned up and ready to wire.

Next up, it was a simple rewire and they were ready to hang. I connected a dimmer switch to the outlet and added vintage style Edison bulbs to complete the look. I tidied up the wires using cable staples and absolutely love the final outcome!

afterhanging1
After

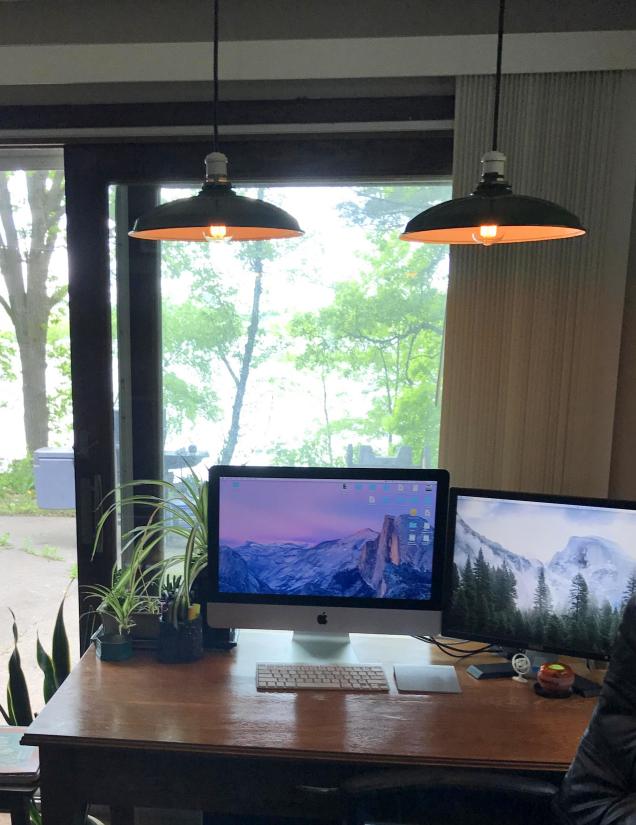
Check out the slideshow below for more “after” images.

This slideshow requires JavaScript.


New year, new project.  

By Sarah from Atomic Magpie

Happy 2017! We know that a lot of people were happy to see the back of 2016 but, for us, it was a great year. A big thank you to everybody that supported Atomic Magpie throughout the year! We look forward to the year ahead.

Happy New Year from Atomic Magpie!

Now, on with the show! The pile of “future projects” has been growing in the garage, and New Year’s Day seemed like a great time to tackle one. It was a quick and easy one, but fun none the less. It made a teensy dent in the pile, but some progress is better than none, right?

I picked up a pair of small, vintage stools for a couple of bucks on a local sell site a few months back, and when I was looking for a new place to put a plant in my bathroom, I knew exactly what I wanted to do.

The “for sale” photo

I started off by wiping the whole piece down with a damp cloth, and lightly sanding the legs and wiping it down again. There was no rust, so prep was minimal on this one. 

No rust = easy prep!

After unscrewing the seat from the legs, I grabbed my ever trusty Rustoleum Metallic Gold and went to work. A couple of coats and it was done. 

Seat before
Legs before (see the foil on the bottom?)

I knew I wanted a two tone look, so I decided to go with a gold dipped look for the legs. I measured the legs and used aluminum foil to cover up the part I wasn’t painting. This is an old trick I’ve used for a while, easy to put on and off, and no risk of tape taking off any paint. The color I used was Rustoleum’s Ocean Mist. It’s a pastel, minty color that looks divine with a gold accent. I love it! 

Tin foil is your friend!

Put the whole thing back together, and voilà! Done. The perfect height and size for the spot I need it in…and, if I’m ever in a pinch for extra seating, I have a stool! 

Finished! From stool to plant stand.